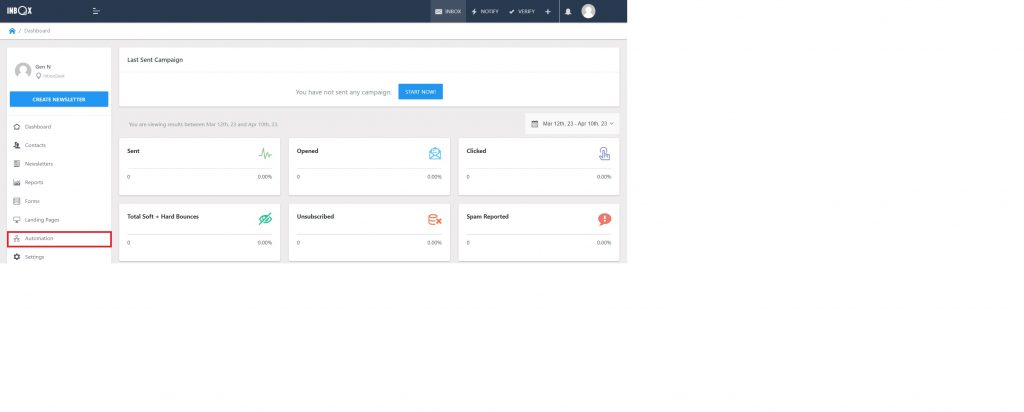
Login to your INBOX account and click Automation.

Click Create Workflow.

Select the Start With Blank Workflow option.

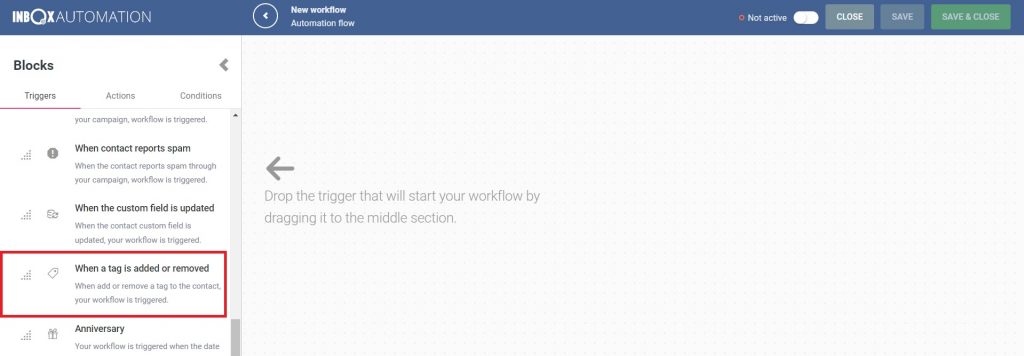
Select and drop the trigger When a tag is added or removed to start your workflow.

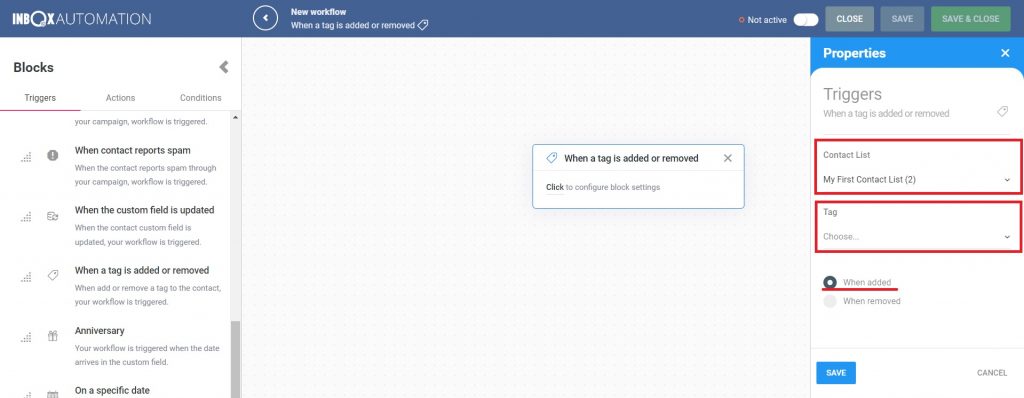
Choose the properties for this trigger:
- Contact List: From the drop-down select the list that was used during your InboxGeek integration
- Tag: Enter the same tag you created during your InboxGeek integration into this field.
- Make sure the When added option is selected.
**If you cannot remember what was selected during your integration, return to your InboxGeek portal > click the Integration tab > refer to columns Tag and Lists.
Once these three properties have been assigned, click Save.

Your next action in this automation will be Send a campaign.

From there, complete the automation as desired.
