Login to Blastable. If you do not already have the content that will be used for this integration then create it now.
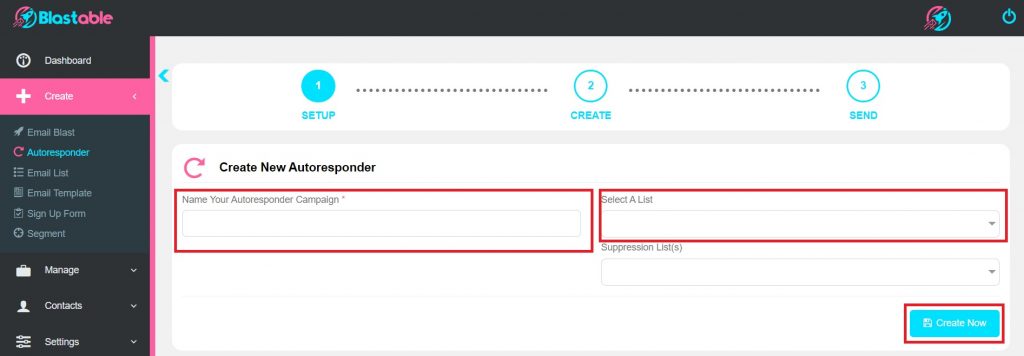
To continue creating your automation, go to Manage → Autoresponders → Create New.

Name your Autoresponder and select the list. This list will be the same list that you used for your reception list in your InboxGeek integration. If you cannot remember what list this is, return to your InboxGeek portal and look under Integrations > Tag.
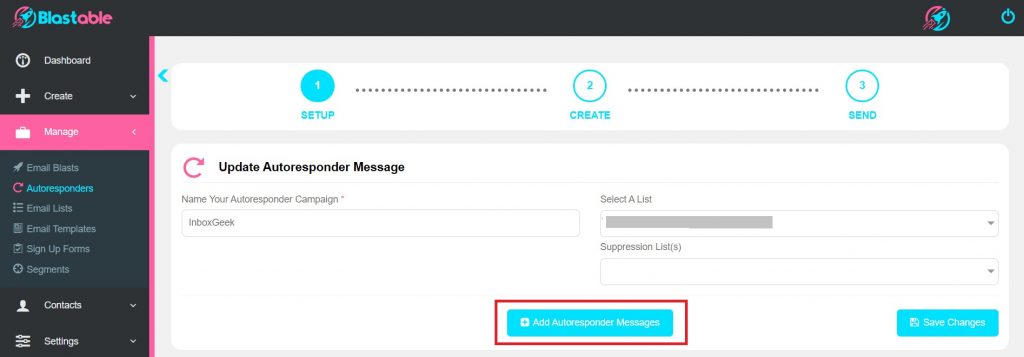
Do not select a suppression list. Continue to the next step by clicking Save Changes.

The option to add an autoresponder message will populate. Once you click this button, the next screen will take you to the settings for the trigger.

Name your new autoresponder message.
The Trigger Event setting will be After Subscribing.
How does this work?
An event is sent from InboxGeek for the online subscriber to Blastable where they will be subscribed to your chosen reception list. Once that event is received, this trigger (After Subscribing) will send the content written in the next step.
>>
The settings for Send After will be zero and Time Period will be Day(s). Then click Next.

Now you will set up the content for your autoresponder. Once your content has been inputted select Next.


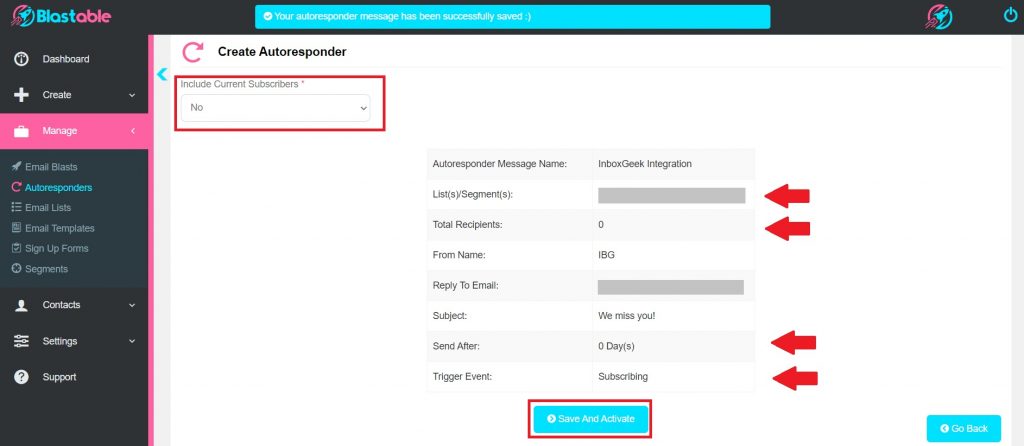
The final step of setting up your autoresponder for your InboxGeek integration consists of confirming your settings. There are 5 settings that you want to check before activating:
- Do not include current subscribers in this autoresponder. This list needs to be empty when integrated with InboxGeek or your events may be interrupted.
- Your List/Segment must match the list you chose during the third step of your InboxGeek integration. If you are unsure that you selected the correct list for the autoresponder, return to your InboxGeek portal and look under Integrations > Tags.
- The Total Recipients value should be zero. If it contains any other number than your list is not empty and this may disrupt your InboxGeek integration. Return to your list in Blastable to remove any contacts that may be currently subscribed.
- The Send After setting must be zero days. Any other value here will delay the send of your content and therefore may not arrive in their inbox while they are still online.
- Confirm the trigger is Subscribing so that InboxGeek will be able to speak to Blastable in order to deliver your content to your subscribers the moment they are online in their inbox.
Click Save And Activate.

