In this article…
Quick Links
Adding Contacts to Your Suppression List by API
In order to add contacts to a suppression list for your source, you first need to log in to the InboxGeek API Documentation site.
API Authorization
Sign in to your InboxGeek Portal.
Click your profile icon, then go to settings.

Choose the ‘API access’ tab
Generate an API key if not done already.
In the bottom, right hand corner of the API key text box you will see a button to view API.
View and copy your API key.

Navigate to the InboxGeek API documentation.
Click Authorize.

In the value field, enter ‘Bearer [API KEY]’ (without brackets).
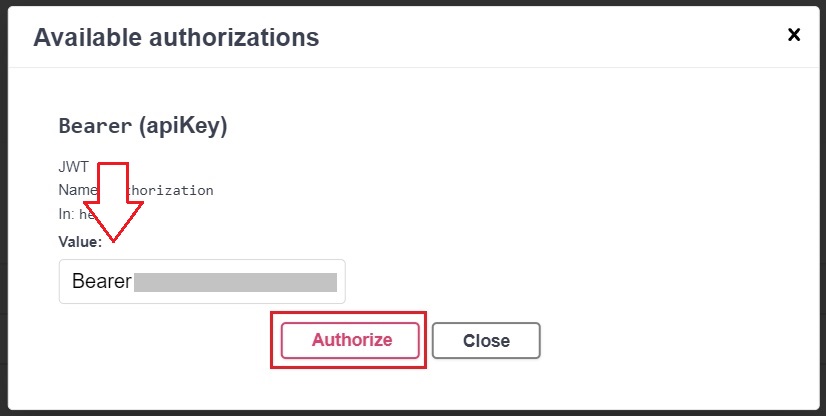
Click Close.
Retrieving Suppression Lists
Scroll Down to LiveLeads – Suppression List.
Click ‘Get.’

Click ‘Execute.’

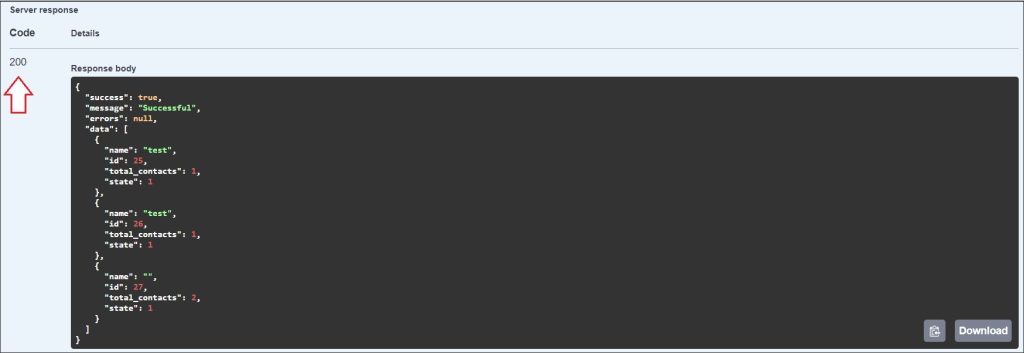
Check the Server Response; a code 200 means success.
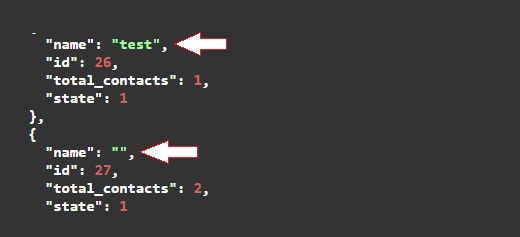
Lines with “name” indicate existing suppression list names.
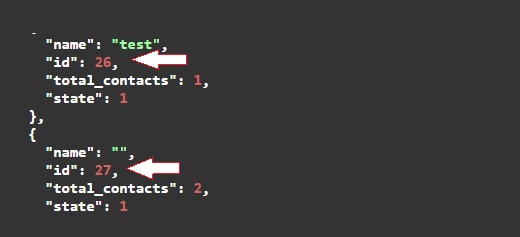
Lines with “id” indicate corresponding IDs. You will need this ID in order to perform Put or Post actions.
Lines with “total contacts” show the number of contacts.
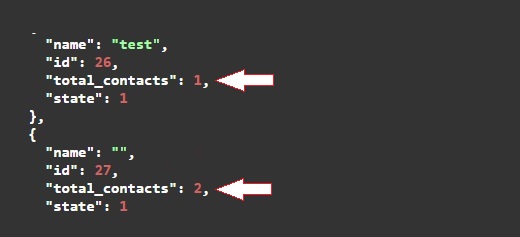
Adding Contacts to an Existing Suppression List
Click ‘Post.’

Click ‘Try it out.’

Enter suppression list ID in the ‘id’ field.
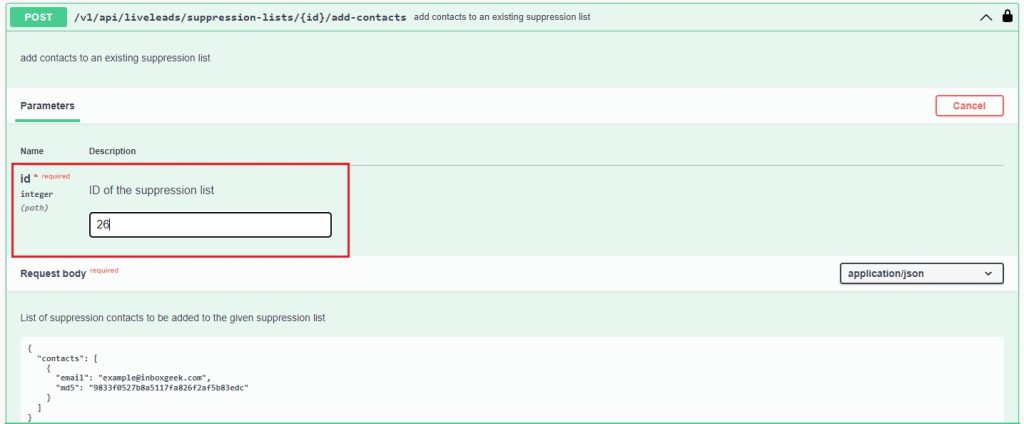
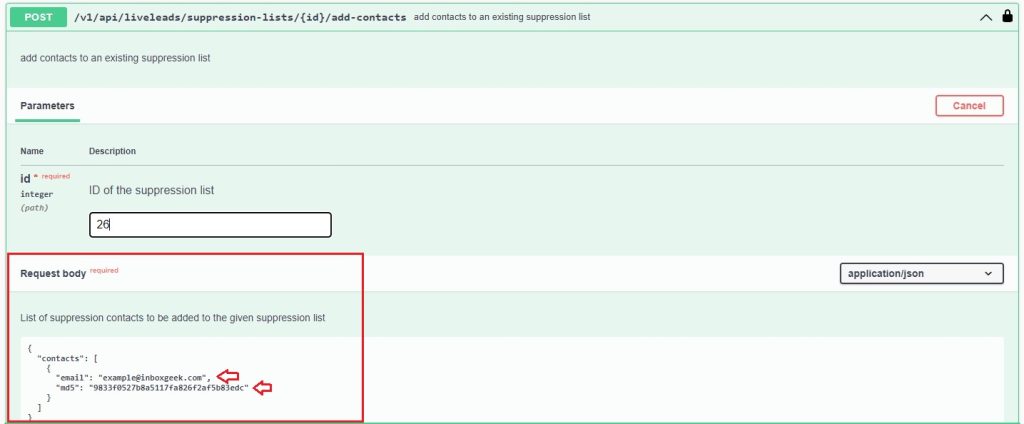
In the Request body, enter contacts. The format can be MD5, plain text, or both.
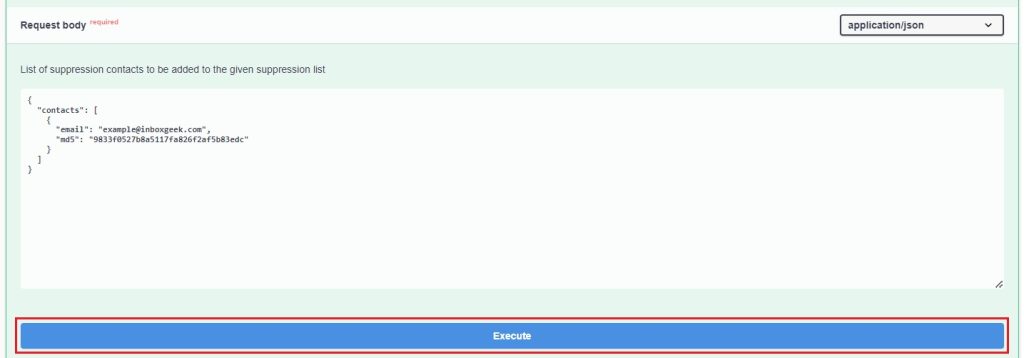
Click ‘Execute.’
Confirm a code 200 in Server Response.
Verify the total contacts in the suppression list.
Adding a New Suppression List and Contacts
Click ‘Post.’

Click ‘Try it out.’

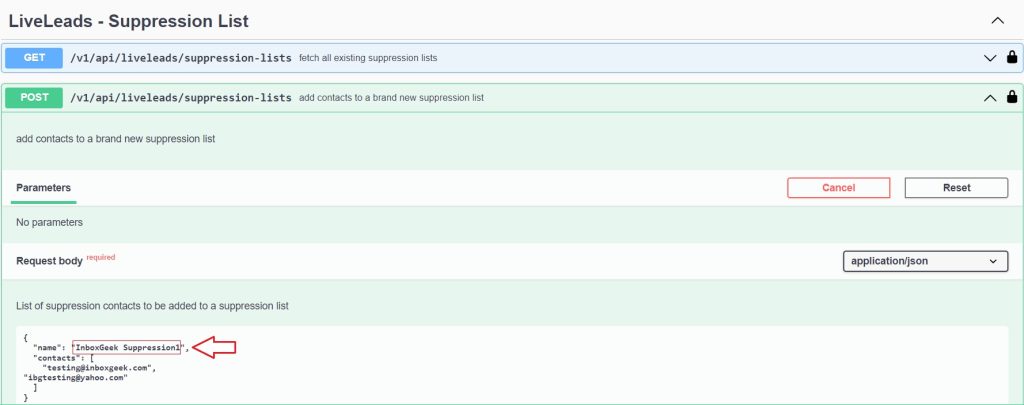
In the Request body, enter the new suppression list name.
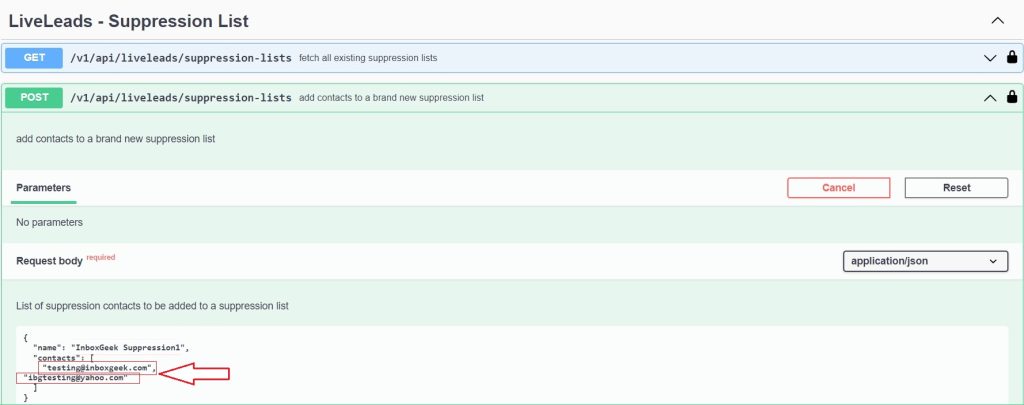
Enter contacts in the desired format.
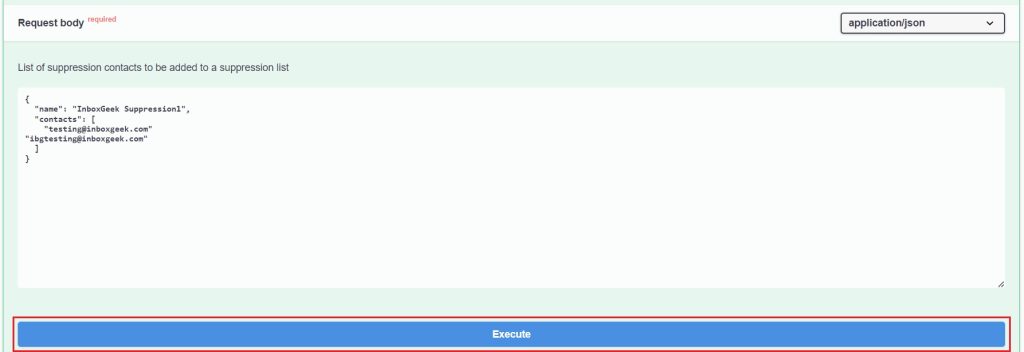
Click ‘Execute.’
Confirm a code 200 in Server Response.
Verify the creation of the new suppression list and total contacts.
Update an Existing Suppression List Name
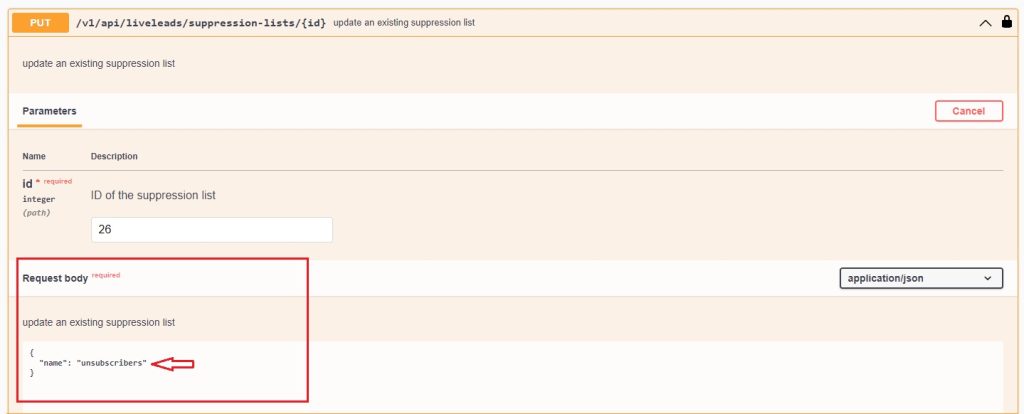
Click ‘Put’.

Click ‘Try it out.’

Enter suppression list ID in the ‘id’ field.
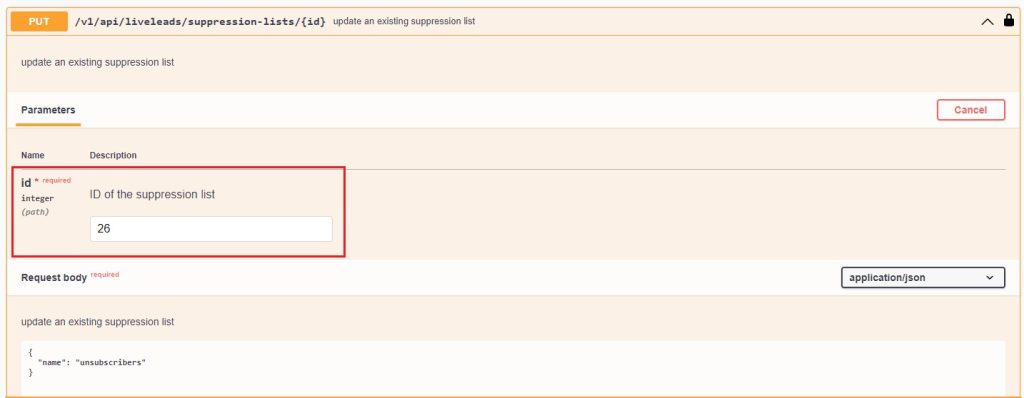
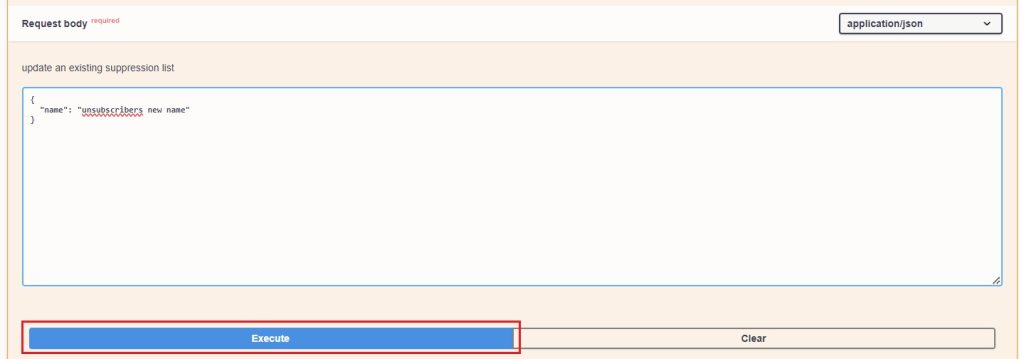
In the Request body, update suppression list name.
Click ‘Execute.’
Confirm a code 200 in Server Response.
Verify the suppression list name updated.
