In this article…
Quick Links
Managing Your Source
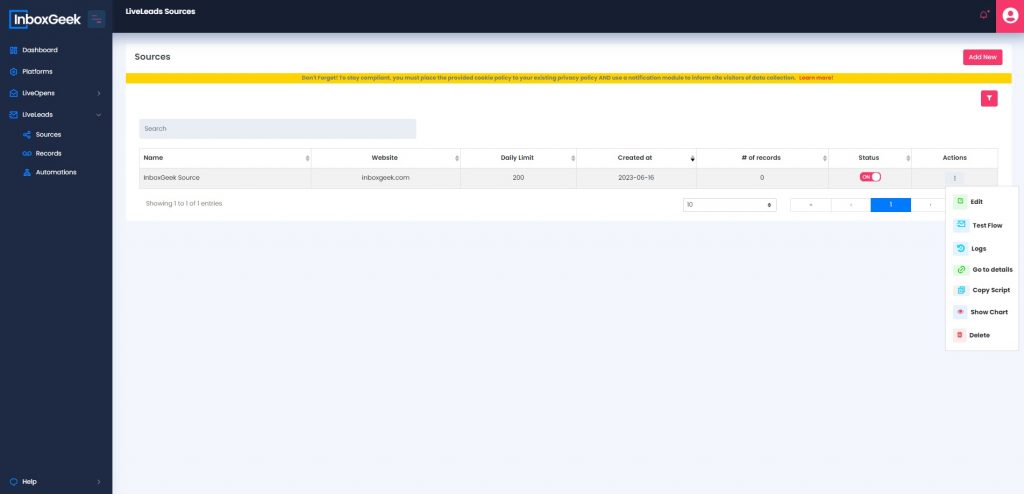
Sources: Available Actions
Once your LiveLeads source has been created, you can perform the following actions:

Edit your source: From here you can update the name of your source, the website URL identification, the daily limit, and the integrated platform. This will take effect immediately and can be changed as often as needed.
![]()
Send a test: If your LiveLeads source was integrated with a platform to send your leads to, you can send a test to your platform to confirm that the integration is set up correctly and to confirm the reception list in your platform account is synced.
![]() View source history: The View source history icon allows you to see any changes that have been made to the source, such as the time and date the source was created or when the source was turned on or off.
View source history: The View source history icon allows you to see any changes that have been made to the source, such as the time and date the source was created or when the source was turned on or off.
![]() View source details: The View details icon will take you straight to the records table for the specific source you choose. This will allow you to view all leads captured by that particular source.
View source details: The View details icon will take you straight to the records table for the specific source you choose. This will allow you to view all leads captured by that particular source.
![]() Copy script: The Copy script icon allows you to copy your script at any time after the source was created. To learn more about how to place your script, click here. This icon also allows you to use the Check Script Installation feature.
Copy script: The Copy script icon allows you to copy your script at any time after the source was created. To learn more about how to place your script, click here. This icon also allows you to use the Check Script Installation feature.
![]() Show chart: The Show chart icon allows you to view your data in a graph representing the site visits for each day that your leads were captured.
Show chart: The Show chart icon allows you to view your data in a graph representing the site visits for each day that your leads were captured.
![]() Delete integration: The trash can icon allows you to delete a source after it has been created. When you delete a source, the email records will no longer be received in your account. However, any previously captured records will continue to stay in your LiveLeads > Records table and will be available for CSV download at any time.
Delete integration: The trash can icon allows you to delete a source after it has been created. When you delete a source, the email records will no longer be received in your account. However, any previously captured records will continue to stay in your LiveLeads > Records table and will be available for CSV download at any time.
- Turn on/off sources: You can turn on and off your sources.
- Filter records: A filter at the top of the page allows you to look for specific date ranges, creation dates, statuses, and cleaning statuses.
Adding a Suppression List
Sign into your InboxGeek portal.
Navigate to LiveLeads from the main menu and click “Sources”.

From the Sources page, click “Suppression Lists” in the upper right hand corner.

Once the Suppression Lists window populates, click on the “Add new” button.

Initial Step
Choose the “Fetch from Platform” option to import suppression data from your chosen platform. If you have not created a platform in your InboxGeek portal and need assistance, follow these steps here.

List Step
Provide a name for your suppression list to easily identify it later.

From the drop-down menu, select the specific list you want to use for suppression, then click Next.

Apply Step
Choose how you want to apply your suppression list:
- At a later time
- Apply to all sources
- Apply to only select sources (select from the dropdown)

After making your selections, a success window will confirm that you’ve created and applied your suppression list as desired.
To view which suppression lists are associated with each source, from your Sources page go to the Actions menu and select “Suppression Lists.”

From the Apply Suppression Lists window, you can remove suppression lists, apply new suppression lists, or upload CSV files directly for your source.
Adding Suppression Lists by API
To use API to add contacts to a suppression list for your source, click here.
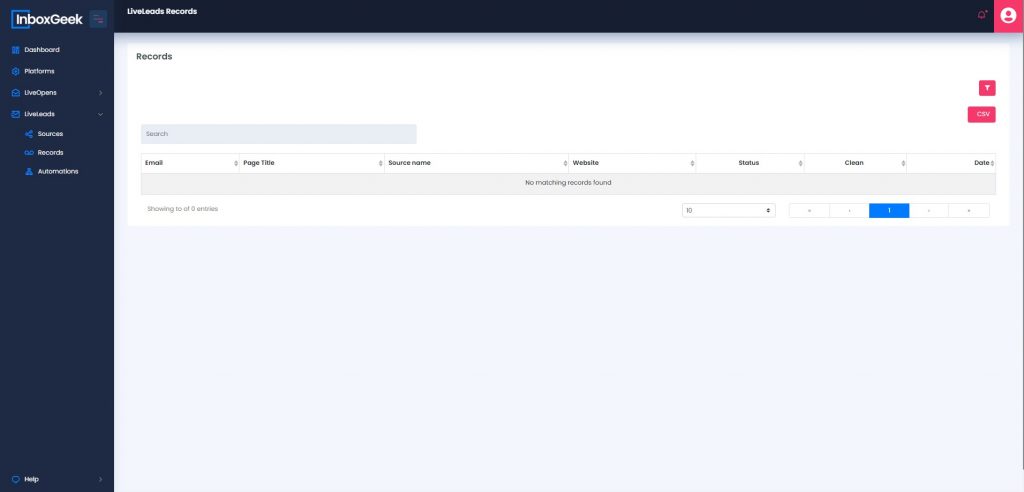
About the Records Table
The records table will show you a list of every single lead that has been captured from your site. It will tell you the status of the validation, whether it has been verified as a true email, or if there is something else that you need to be concerned about (spam trap, malformed, etc.).
The date that the lead was captured is shown in Eastern Time. If your source was integrated with a platform, then the status will tell you that the event was sent. If it is not, then it will just say the event was received to your InboxGeek portal.
You can filter the records table by the source that you created, the platform that was integrated with, the title page that was written, where the lead was found, the website, the date from and date to, the status, and the cleaning status. Whatever you choose, this filter table will be included in the CSV if you choose to download it after filter has been applied.