In this article…
Quick Links
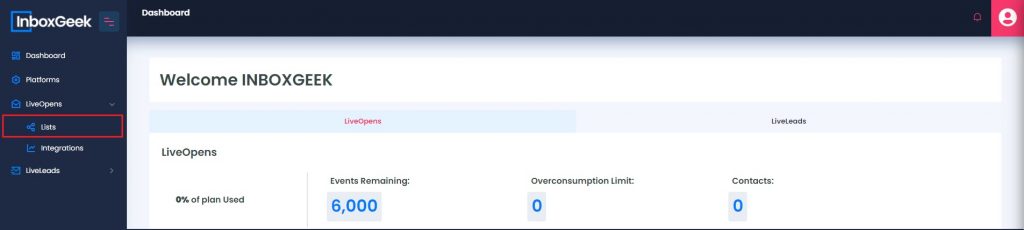
LiveOpens Overview
LiveOpens delivers your email to your subscriber the moment they are active in their inbox. That’s the big picture, but let’s break it down a bit.
InboxGeek knows when an estimated 40 – 60% of your subscribers are actively engaged in their inbox.
By creating an API integration with your Emailing Service Platform, InboxGeek will sync with a list chosen by you, and then send events (API calls) to your integrated platform every time one of your subscribers is active in their inbox.
What happens when an event is sent to my platform?
InboxGeek recognizes your contact is active in their inbox and via an API call, adds a tag to that contact.
As long as your integration is set up correctly, the tag will trigger an automation within your platform. At that point your platform sends content of your choosing to that active subscriber.
All of this happens in less than 10 milliseconds.
Your platform, lists, tags, and content are all chosen by you with as much help from an InboxGeek team member as you’d like.
Every single client has a dedicated Account Manager ready to be hands on the moment you have questions or want to talk strategy.
Below you will find details of the LiveOpens service. This service contains several sections that allow you to manage your integrated lists, view reports, and update integration settings.
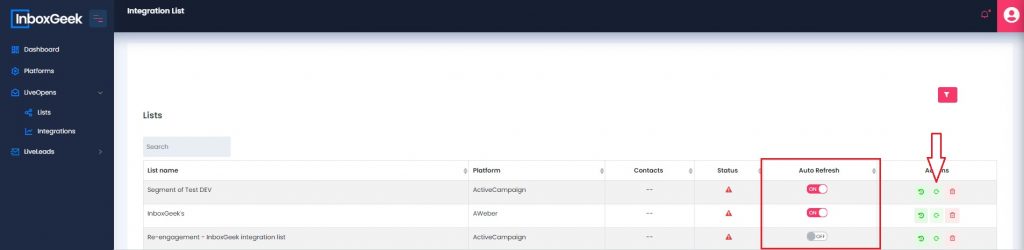
Integrated Lists
Under LiveOpens > Lists, you will find all of the lists that are a part of your LiveOpens integrations. This page displays the name of the lists that are/were currently integrated, which platform your list is from, how many contacts are contained there, and houses the auto refresh feature.
Auto Refresh Feature
Update each individual list with the auto refresh feature by toggling the on/off button. The auto refresh feature will update your list every day at midnight EST to reflect any changes made to your list within your platform. If you don’t want to wait until midnight, there is the option to manually refresh the list to immediately reflect the updated contact list.
To manually refresh, click the green clock-wise circular arrow under the Actions column. You will know that the list is refreshing by the loading symbol under Status.
LiveOpens Report
Within this window you will find real-time data on how many events are sending each day. Notice the ‘eye’ icon on the far right; this allows you to view a graph of the data within the specified date range.

This page shares with you important details of your integrations. This includes:
- The tag you used in your platform to recognize which contacts have received events from InboxGeek.
- The list(s) you integrated with LiveOpens.
- The name you created for your integration.
- The platform used for each integration.
- The total number events sent from InboxGeek to your platform specific to the date range selected at the top of this page.
- How many contacts are in your integrated list. If for some reason the list you used in your platform does not reflect the same number of contacts that your InboxGeek account displays then reach out to an InboxGeek team member at [email protected]. This could be due to the auto-refresh feature disabled or a disconnect with your API key/Token.
- Your current event limit will display under the daily cap column; this is how many events you want to send per day. If you need to update this amount, see Managing Your Integration → Updating Your Integration Settings → DAILY LIMIT FEATURE.
- An average of how many events were sent per day within the specified date range on this page.
- The date the integration was created
The second action you can perform from the Events Report tab is the ability to request from the InboxGeek system what events have been sent to your platform. The InboxGeek system will auto-generate a file that includes the day, time and subscriber that was tagged. This information is only accessible by the owner of the account and the request will be returned to the email address on file at the time of the request. The InboxGeek team does not have the ability to access this file so any questions about the data received will be escalated to the IT team and reviewed at that level.

Your Integration ‘Actions’ Bar
You can customize how you see your data in all tables within your InboxGeek portal. This includes the actions bar that allows you to make changes to your integration. Here’s how:
- Click the “Filter” button above the table.
- Then, click the dropdown menu called “Displayed Columns.”
- Choose the columns you want to see by selecting them.
All customizations are updated immediately and are saved for future logins.
See below for description of each Action:
 View Graph: View your data in graph form for customizable range of dates.
 Email Event Log: Send a log of all events that were sent to your platform for that integration.
 Integration History: View the history of changes made to your integration.
 Edit Integration: Update your daily limit or turn on/off your integration.
 Send Test Flow: Send a test event to your integrated platform to test your automation is set up correctly in your platform.
 Delete Integration: Delete an integration permanently.
For detailed information on each action, read more at Managing Your LiveOpens Integration.