Quick Links
Suggested Content
Adding A Platform to Your InboxGeek Account
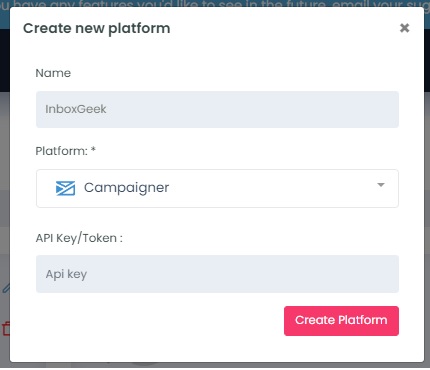
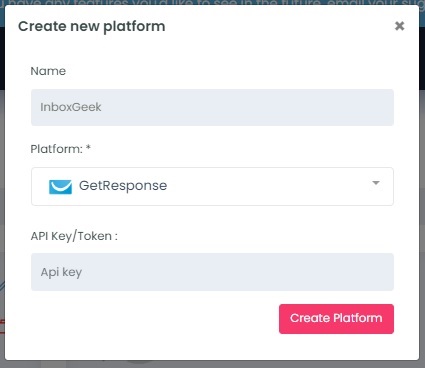
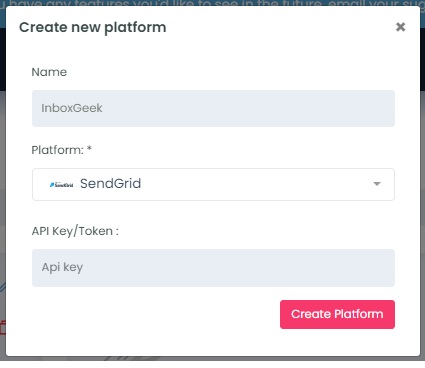
Add your new platform by first giving it a name that will easily distinguish it from another platform, then choose your ESP and follow the steps below to gather the credentials.
Only add unique platform accounts to your InboxGeek account. If InboxGeek recognizes a duplicate platform account, a notification will populate indicating so.
Example:
Jess created a LiveOpens integration using her ActiveCampaign platform (account ending in 27). Jess later attempts to create a new platform using those same ActiveCampaign credentials ending in 27. InboxGeek will notify Jess that this platform already exists and if she continues to add this duplicate account, then she risks delayed list synchronization and poor performing integrations.
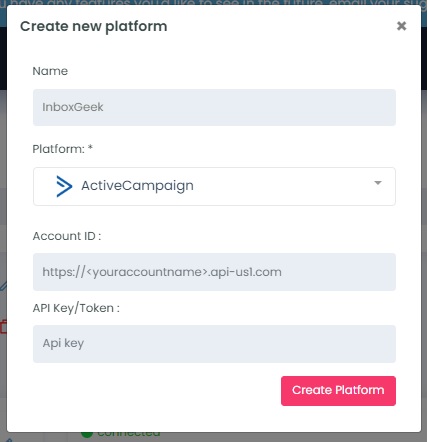
From the drop-down menu select ActiveCampaign.
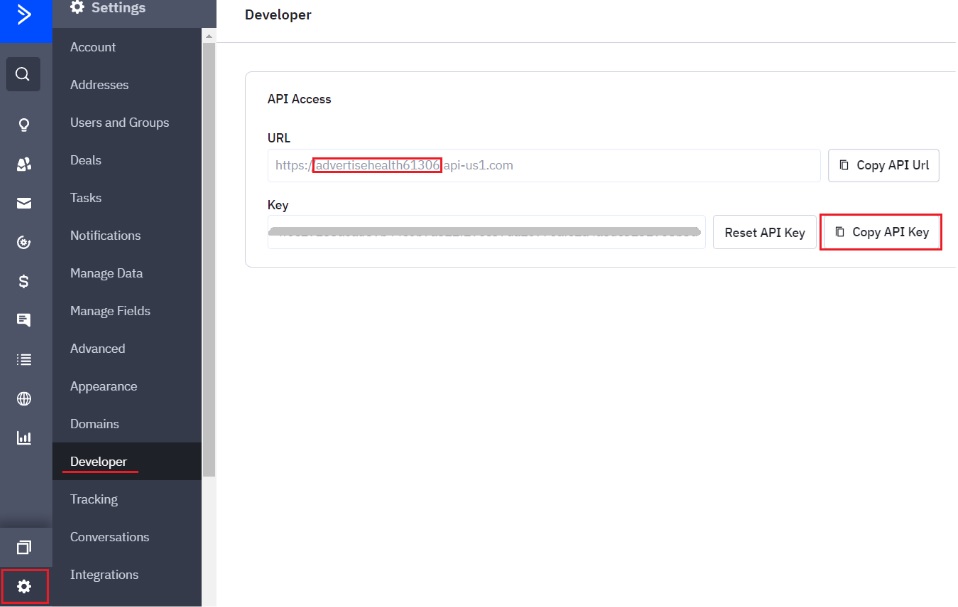
To retrieve the API key/Token and Account ID, login to your ActiveCampaign account.
Click Settings → Developer. Copy the account ID from the URL.
The account ID will be the name within the URL https://YOURACCOUNTNAME.api-us1.com. If you enter your entire URL, a pop up window will say ‘Your Api Token is not valid’.
Click Copy API Key.
In InboxGeek, enter copied Account ID into the Account ID field and the copied API key into the API key/Token field.
Click Create Platform.
From the drop-down menu, select AWeber and then click Add New AWeber.
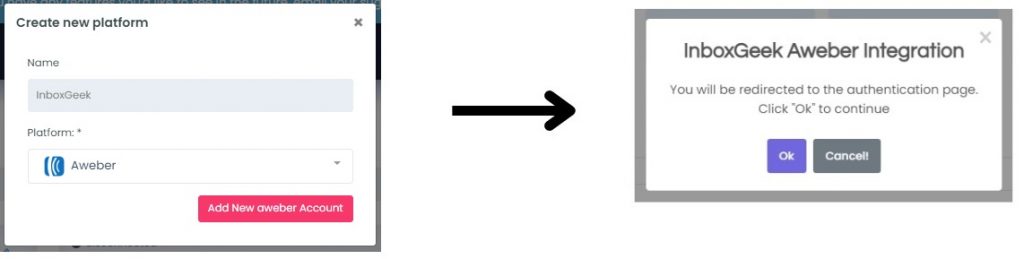
You will be redirected and the AWeber application will automatically open and request permission for access by having you sign into your AWeber account.
Once signed in to AWeber, you will automatically be redirected back to the InboxGeek portal. There is lag time of about 10 seconds before the Create New Platform window reappears. Your Account ID will auto-populate into the Account ID drop-down; select your Account ID.
Click Create Platform.
From the drop-down menu, select Blastable.
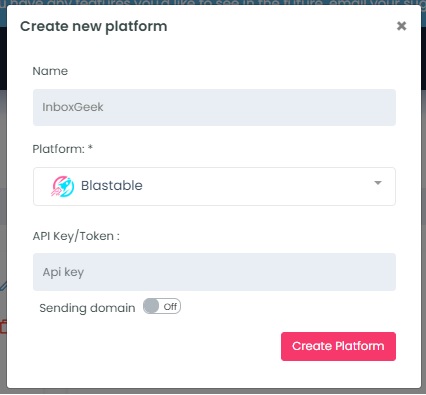
For the Sending domain option, select On if your Blastable account is enterprise or keep Off if your Blastable account is standard.
To retrieve the API key/Token, log into your Blastable account.
Click Settings → API Keys
Then click Copy next to the API Key (use existing or create a new one)
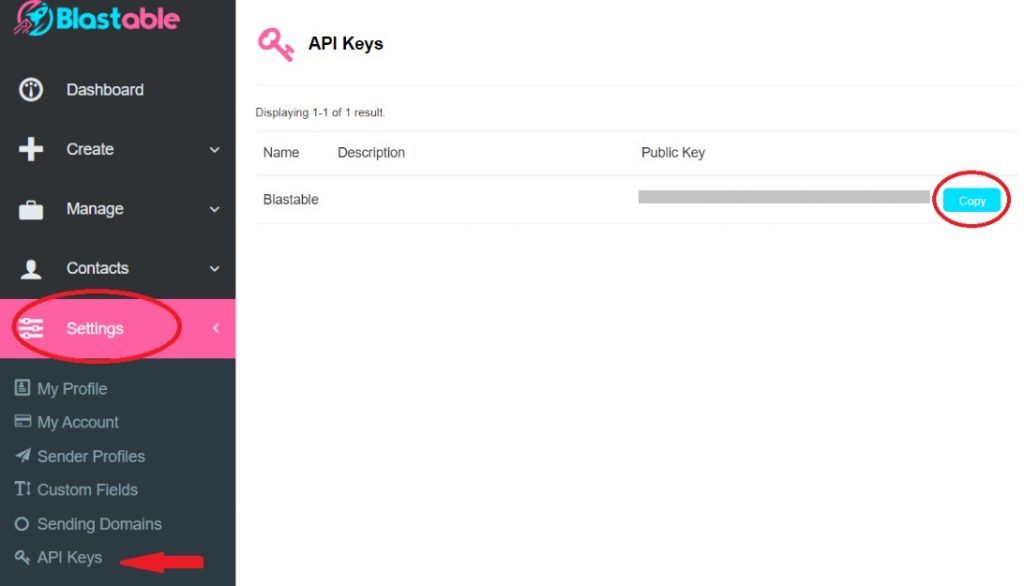
Return to InboxGeek and enter the copied API Key into the API key/Token field.
Click Create Platform.
From the drop-down menu, select Campaigner.
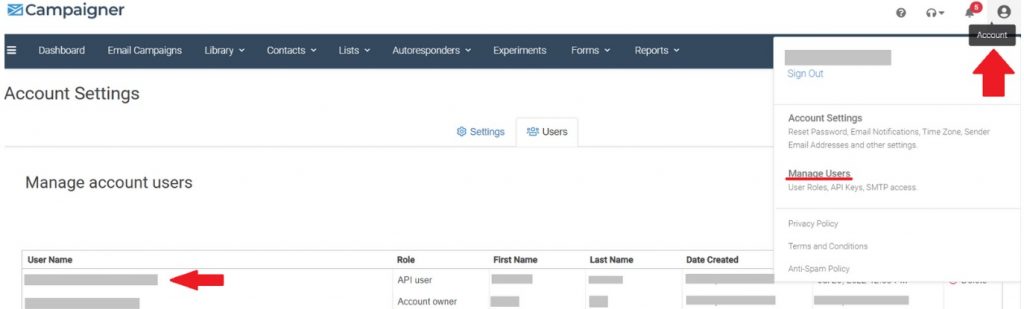
To retrieve the API key/Token, log into your Campaigner account.
Click Account → Manage Users → Select an email address
Click API Keys → Copy the API Key
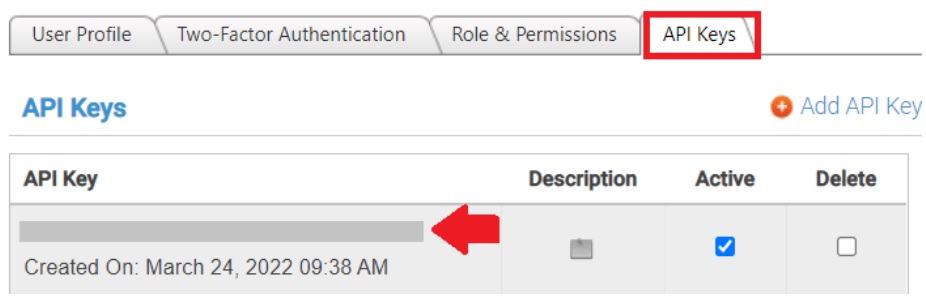
Return to InboxGeek and enter the copied API Key into the API key/Token field.
Click Create Platform.
From the drop-down menu, select ConvertKit.
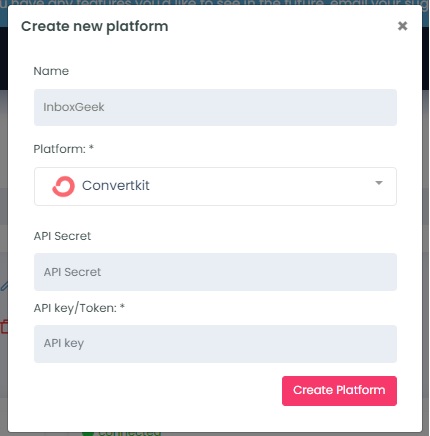
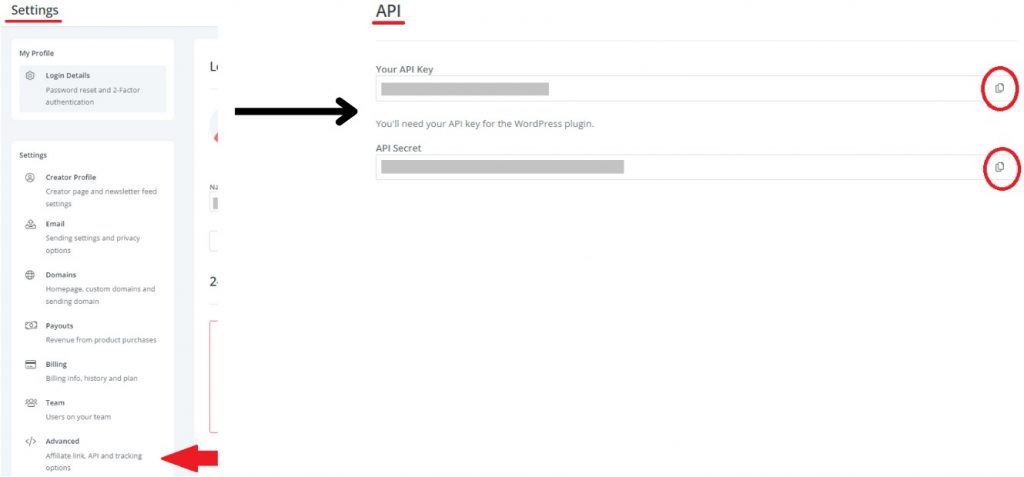
To retrieve the API Secret and API Key, login to your ConvertKit account.
Click Account → Settings → Advanced → Scroll down to API → Copy Your API Key and API Secret
In InboxGeek, enter copied API secret into the API Secret field and the API Key into the API key/Token field.
Click Create Platform.
From the drop-down menu, select EmailOctopus.
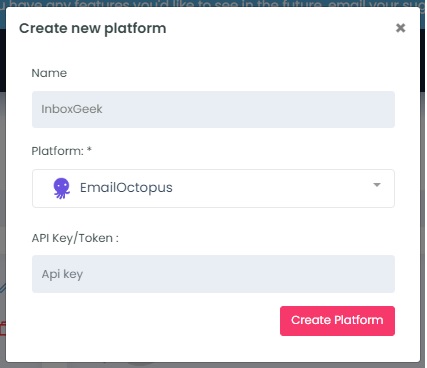
To retrieve the API Key, login to your EmailOctopus account.
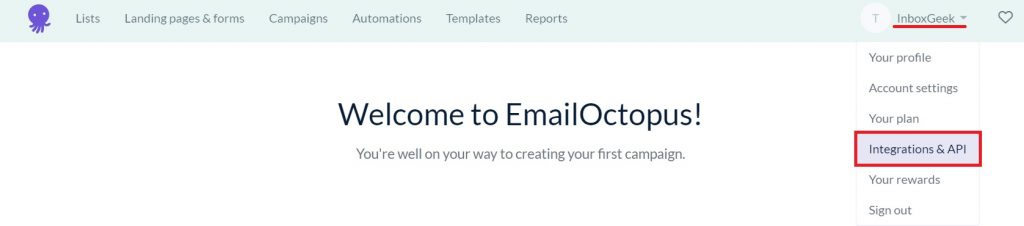
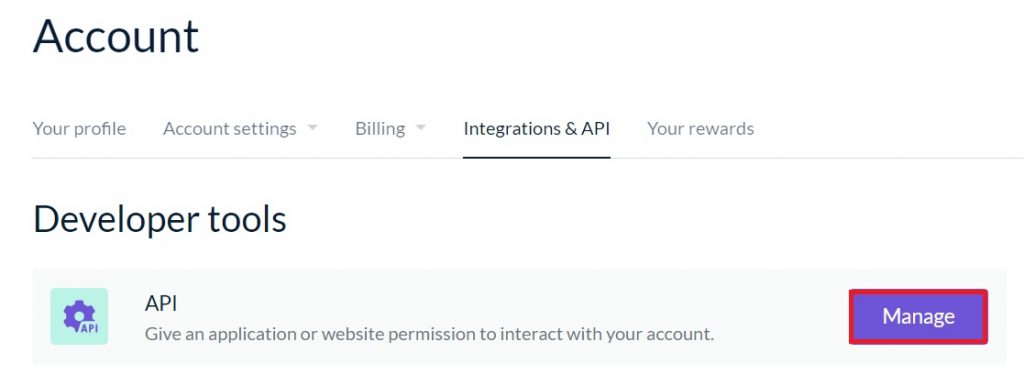
Click on your profile in the upper right-hand corner → Select Integrations & API.
Select Manage.
Select Create key.
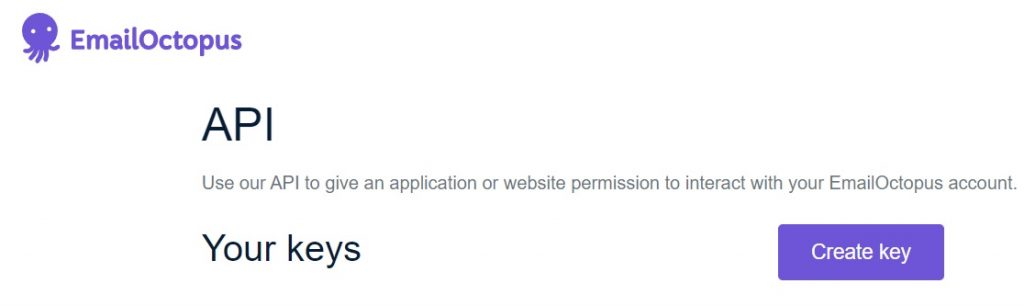
Create a new EmailOctopus API key. Type the name in the Key name field and click Create.
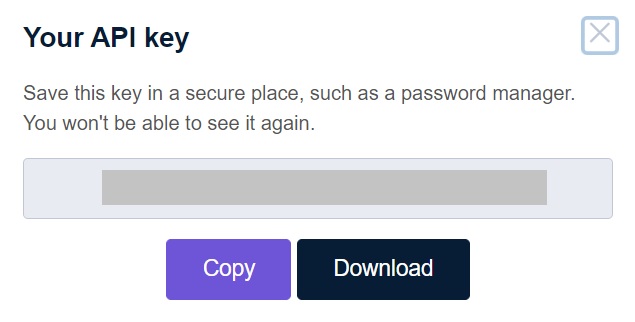
Click Copy.
**NOTE** this is the only time you can copy the API token, it will disappear after this screen and a new token will need to be created if a copy is not used right away.
Return to InboxGeek and enter the copied API key in the API key/Token field.
Click Create Platform.
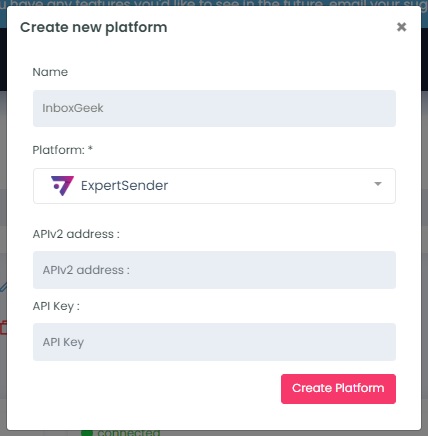
From the drop-down menu, select ExpertSender.
To retrieve the API Key and APIv2 address, login to your ExpertSender account.
Click Settings → Business Unit → Click API → Copy Your API Key → Copy Your APIv2 address
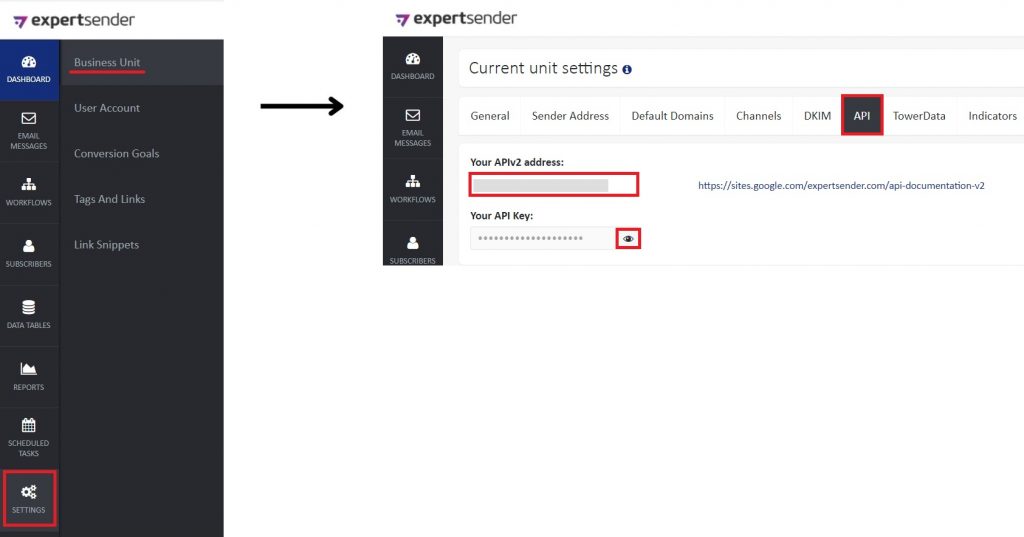
In InboxGeek, enter the copied APIv2 address into the APIv2 address field and the copied API Key into the API key/Token field .
Click Create Platform.
From the drop-down menu, select GetResponse.
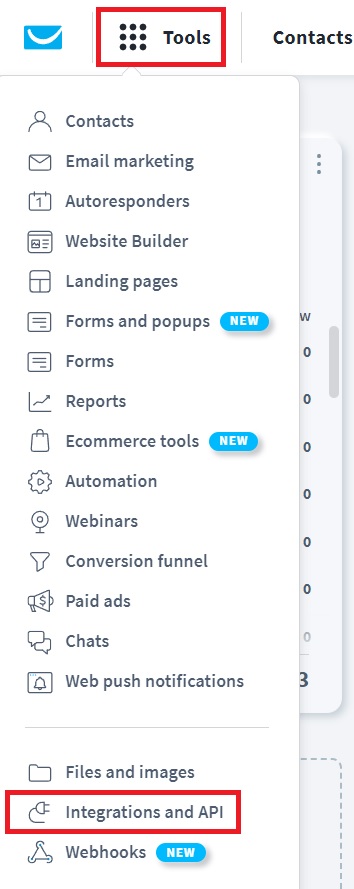
To retrieve the API key/Token login to your GetResponse account.
Click Tools → Integration and API.
Click API. Copy an existing API key or generate a new one.
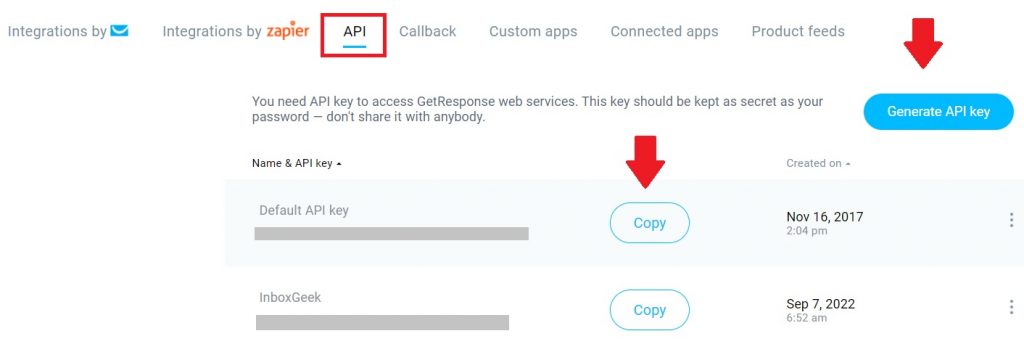
In InboxGeek, enter copied API key into the API key/Token field.
Click Create Platform.
From the drop-down menu, select HubSpot and then click Add New HubSpot.
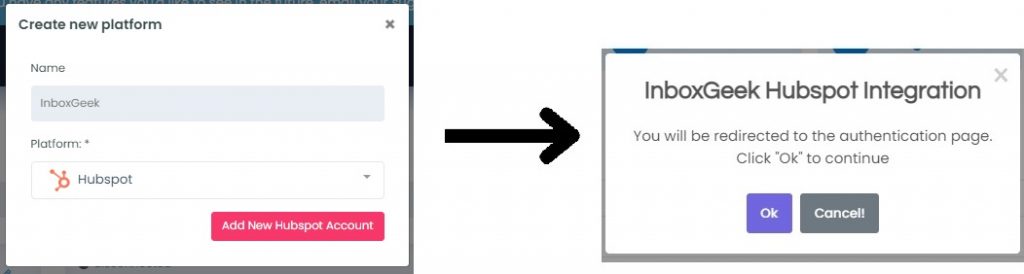
You will be redirected and the HubSpot application will automatically open and request permission for access by having you sign into your HubSpot account.
Once signed in to HubSpot you will automatically be redirected back to the InboxGeek portal. There is lag time of about 10 seconds before the Create New Platform window reappears. A confirmation window will populate confirming the successful authorization. Click OK.
Your Account ID will then auto-populate into the Account ID drop-down; select your Account ID.
Click Create Platform.
From the drop-down menu, select Keap and then click Add New Keap.
You will be redirected and the Keap application will automatically open and request permission for access by having you sign into your Keap account.

Once signed in to Keap, you will automatically be redirected back to the InboxGeek portal. There is lag time of about 10 seconds before the New Integration window reappears. Your Account ID will auto-populate into the Account ID drop-down; select your Account ID.
Click Create Platform.
From the drop-down menu, select Klaviyo.
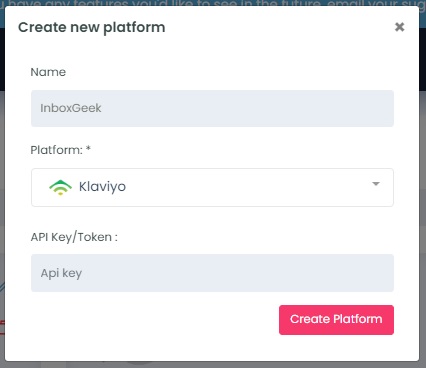
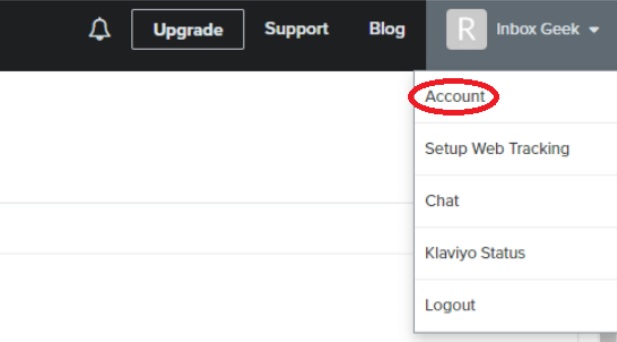
To retrieve the API key/Token, login to your Klaviyo account. Click on your profile → Select Account.
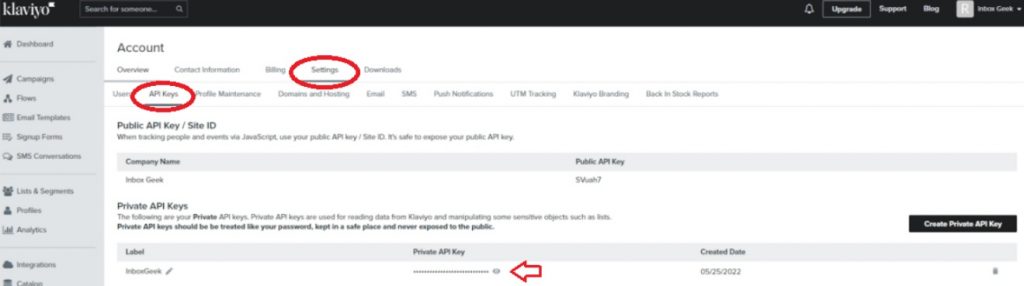
Select Settings → Select API Keys → Copy API Key
Return to InboxGeek and enter the copied API Key in the API key/Token field.
Click Create Platform.
From the drop-down menu, select Mailchimp and then click Add New Mailchimp.
You will be redirected and the Mailchimp application will automatically open and request permission for access by having you sign into your Mailchimp account.

Once signed in to Mailchimp, you will automatically be redirected back to the InboxGeek portal. There is lag time of about 10 seconds before the New Integration window reappears. Your Account ID will auto-populate into the Account ID drop-down; select your Account ID.
Click Create Platform.
From the drop-down menu, select Maropost.
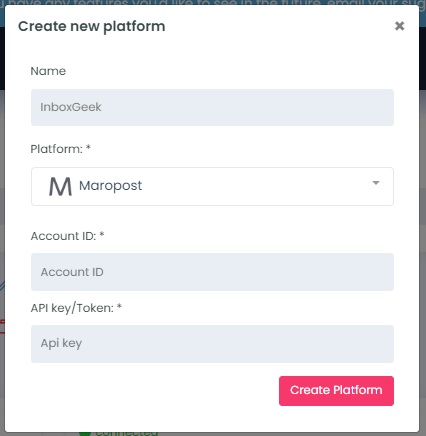
To retrieve the API token and Account ID, login to your Maropost account.
The Account ID is in the URL for the Maropost dashboard.

In InboxGeek, enter copied Account ID into the Account ID field.
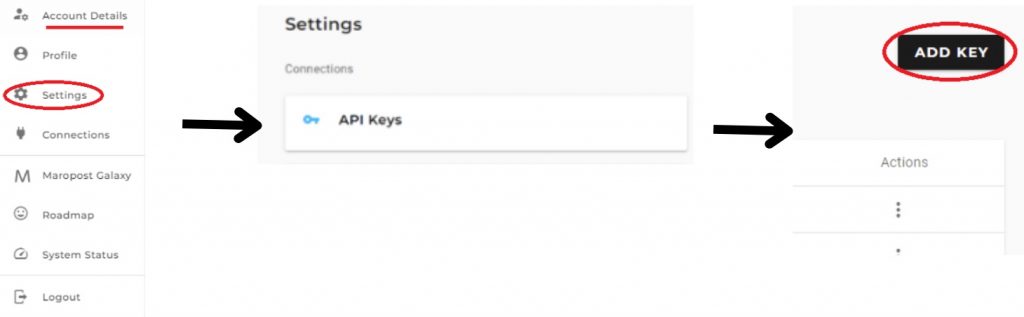
To retrieve the API key/Token:
Click Account Details → Select Settings → Click API Keys → Select Add Key
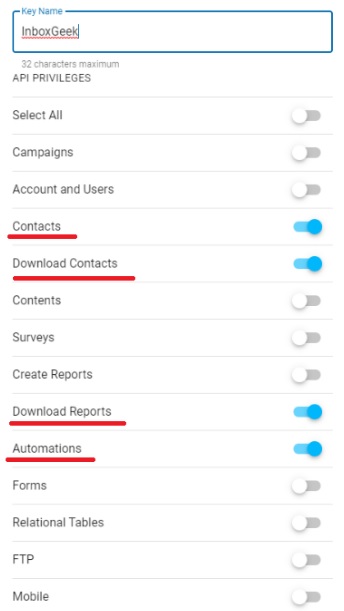
Deselect all settings; Select Contacts, Download Contacts, Download Reports, and Automations.
Name the new API Key. Click Save. Screen will return to API Keys.
Click the copy icon beside the new API Key just created.
Return to InboxGeek and enter the copied API Key in the API key/Token field.
Click Create Platform.
From the drop-down menu, select Ontraport.
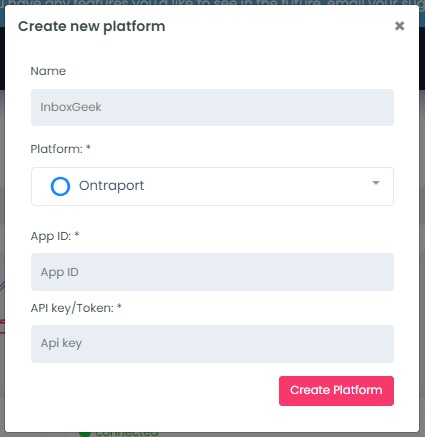
To retrieve the API key/Token and APP ID, login to your Ontraport account.
Click on Profile → Select Administration.

Select Integrations → Click Ontraport API Instructions and Key Manager.
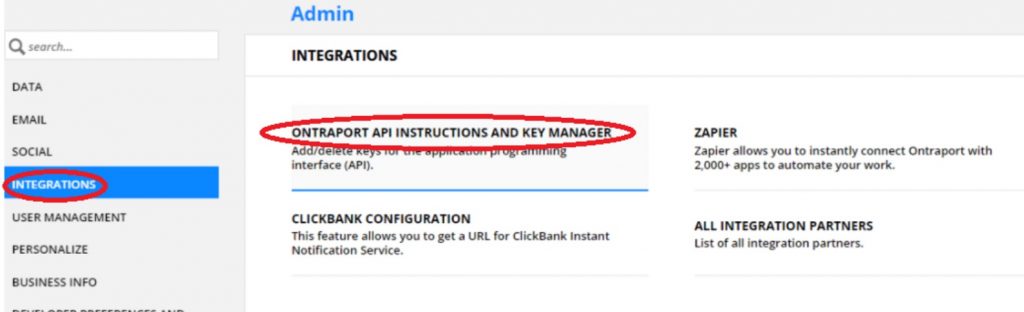
Copy the API key and the APP ID.

Return to InboxGeek and enter the copied API key into the API key/Token field and the APP ID into the APP ID field.
Click Create Platform.
From the drop-down menu, select SendGrid.
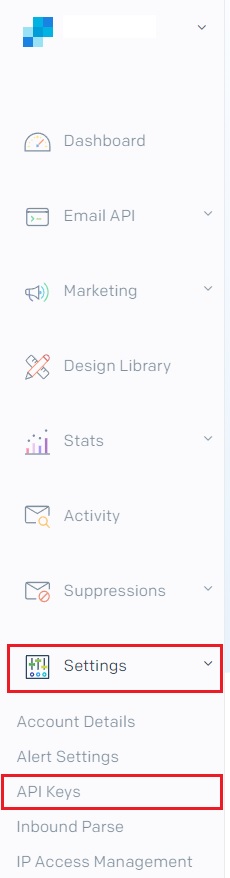
To retrieve the API key/Token, login to your SendGrid account.
Click Settings → API Keys.
If you don’t already have an API key saved for easy access, create a new API key here.
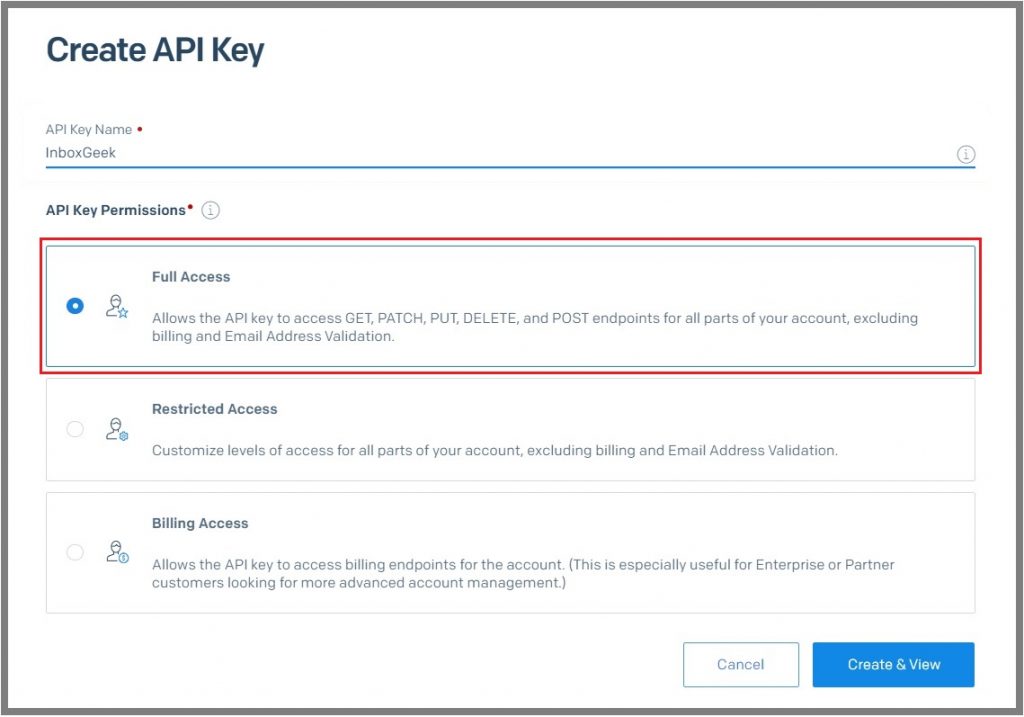
Click Create API Key.

Name your API key and select the settings. For InboxGeek integrations, the setting needs to be set for Full Access.
Click Create & View.
Copy your API Key.
**NOTE** this is the only time you can copy the API key, it will disappear after this screen and a new API key will need to be created if a copy is not used right away.
Return to InboxGeek and enter the copied API key in the API key/Token field.
Click Create Platform.
From the drop-down menu, select Brevo.
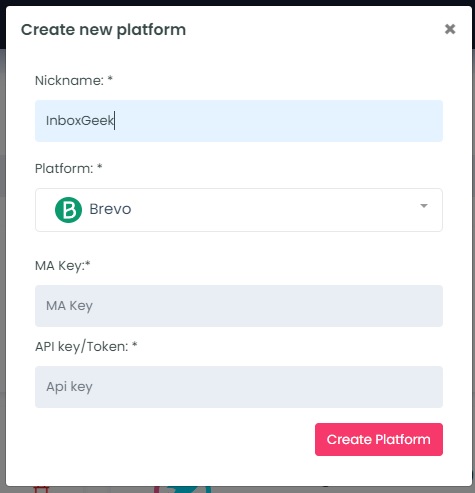
To retrieve the MA Key and API Key, login to your Brevo account.
Click on the Automations tab → Select Settings → Select Tracking Code.
Scroll down until you see section 2. Under section 2 there is a line that reads client_key:. Copy the text between the two parentheses.
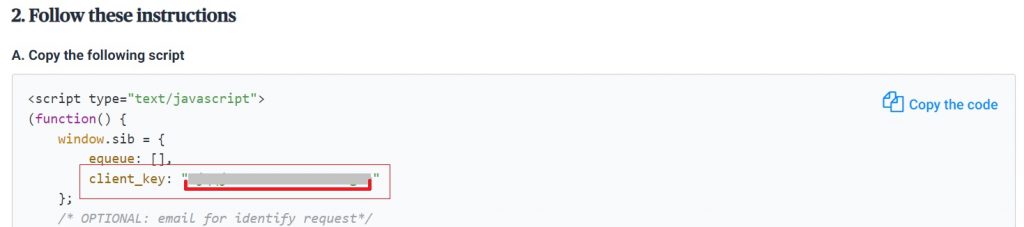
Return to the InboxGeek window and enter the copied client key in the MA key field.
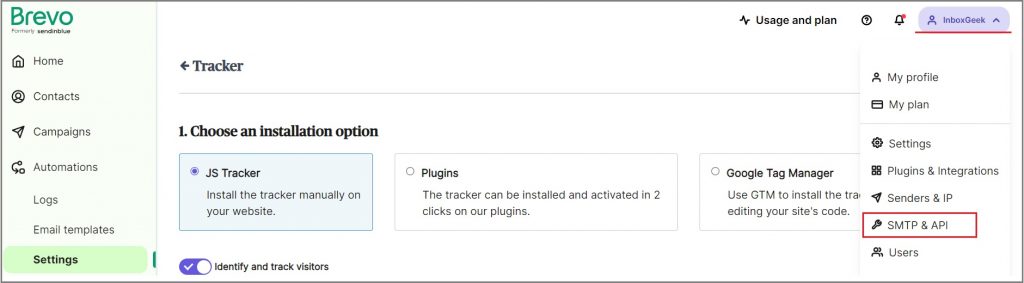
Now return to the Brevo window to retrieve the API key.
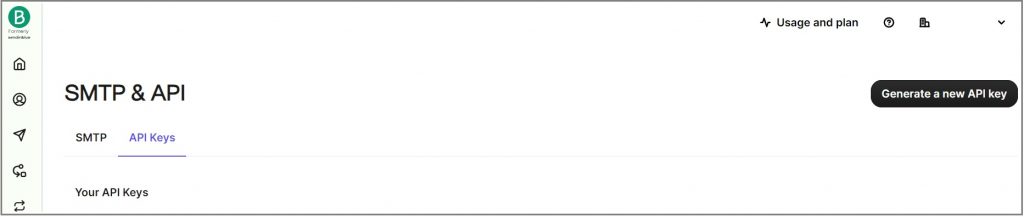
Click on your profile in the upper right-hand corner → Select SMTP & API.
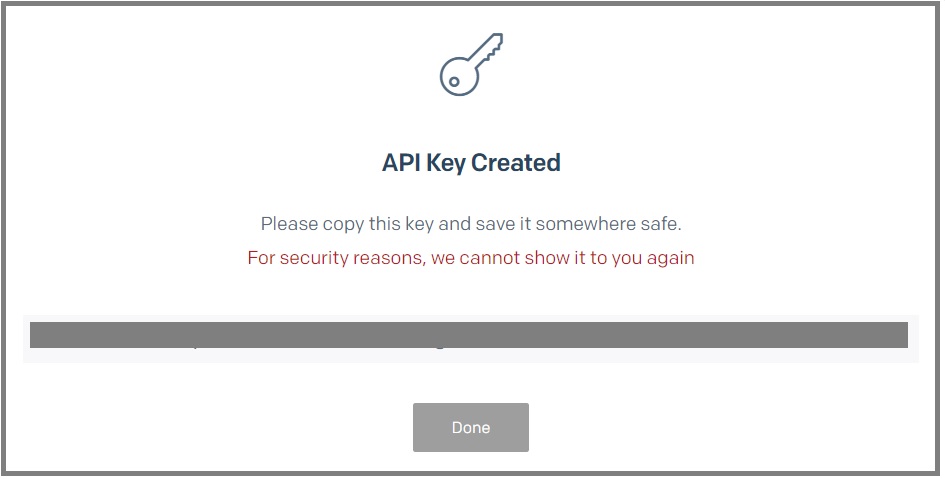
If you do not have a previous API key saved, then create a new one here by clicking Generate a new API key.
Name your API key and click Generate.
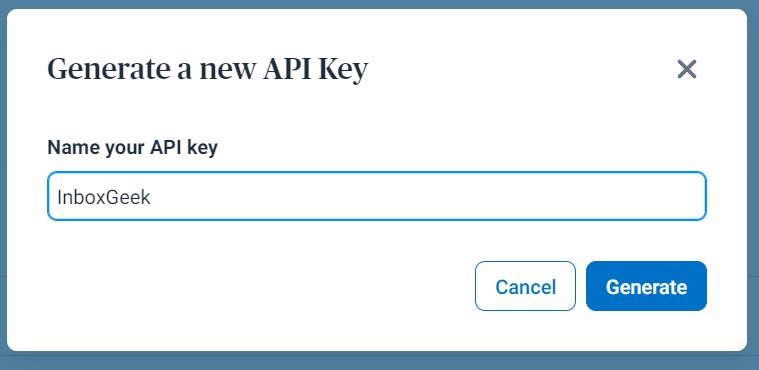
Click Copy.
**NOTE** this is the only time you can copy the API key, it will disappear after this screen and a new key will need to be created if a copy is not used right away.
Return to InboxGeek and enter the copied API key in the API key/Token field.
Click Create Platform.
From the drop-down menu, select Sendlane.
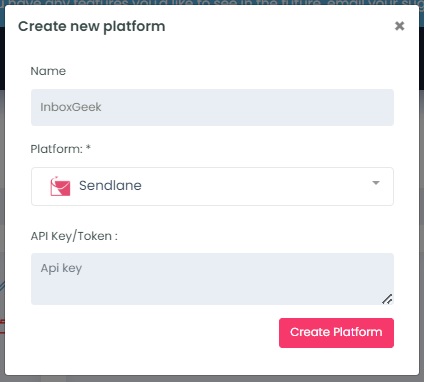
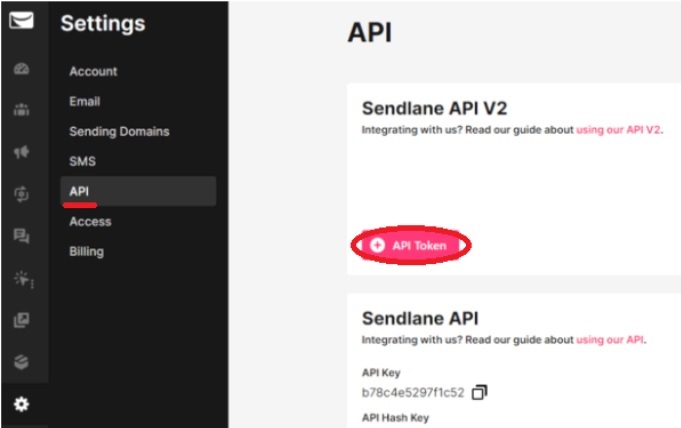
To retrieve the API key/Token, login to your Sendlane account. Select Account → Select API → Click +API token.
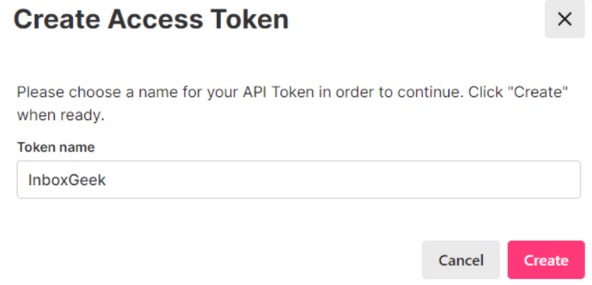
Create a new Sendlane API V2 Token. Type the name in the Token Field and click Create.
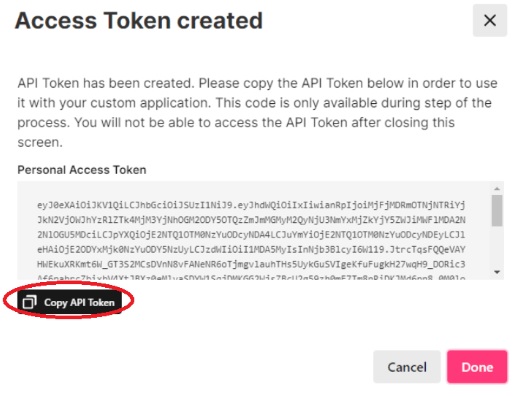
Click Copy API Token.
**NOTE** this is the only time you can copy the API token, it will disappear after this screen and a new token will need to be created if a copy is not used right away.
Return to InboxGeek and enter the copied API token in the API key/Token field.
Click Create Platform.
From the drop-down menu, select UseInbox.
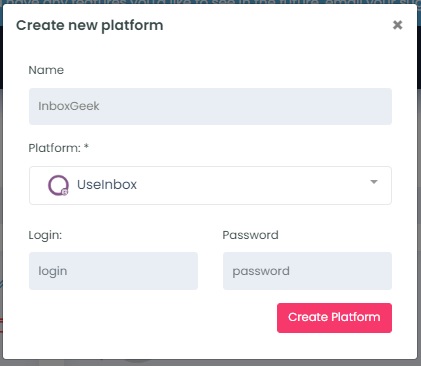
Log into your UseInbox account through InboxGeek.
Click Create Platform.
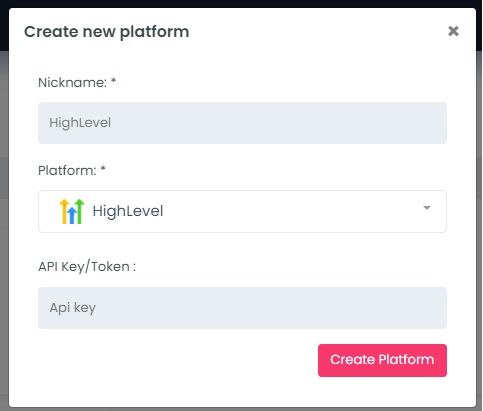
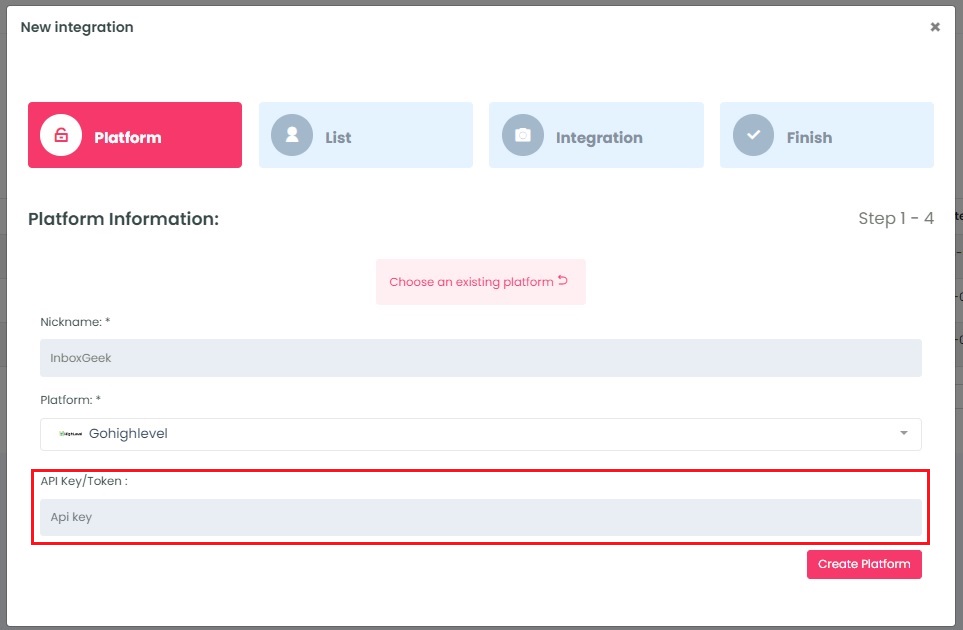
From the drop-down menu select HighLevel.
To retrieve the API Key, login to your HighLevel account.
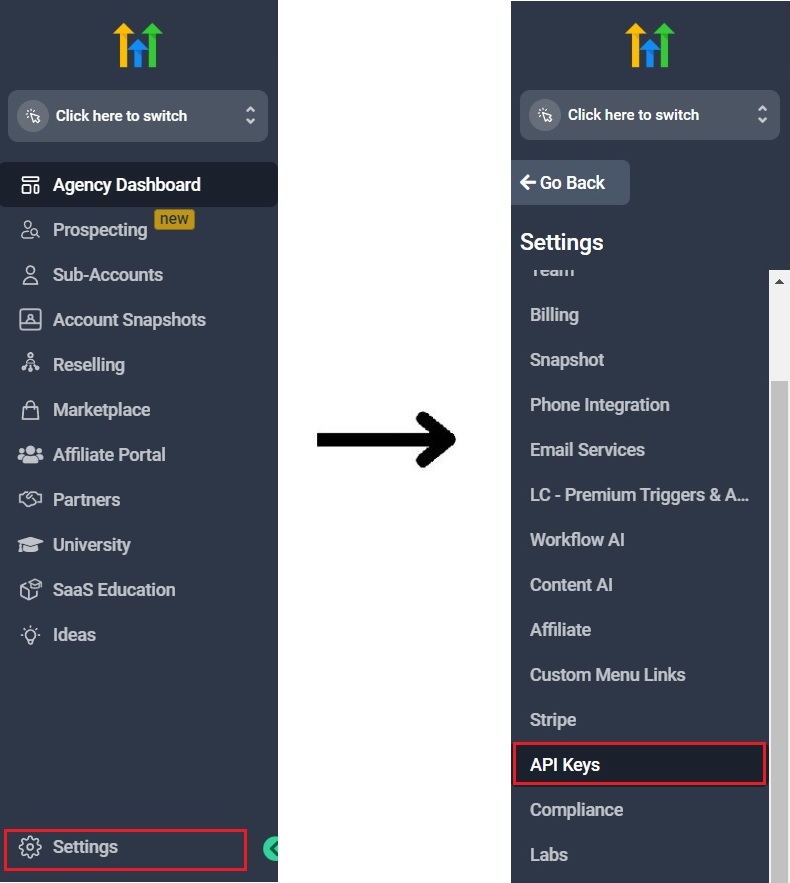
From the Agency dashboard, click Settings → API Keys.
Copy your API Key.

In InboxGeek, enter copied API Key into the API key/Token field.
Click Create Platform. InboxGeek will fire a ping to the API key to confirm all is accurately entered. If there are no issues then it will add HighLevel to your list of integrated platforms.
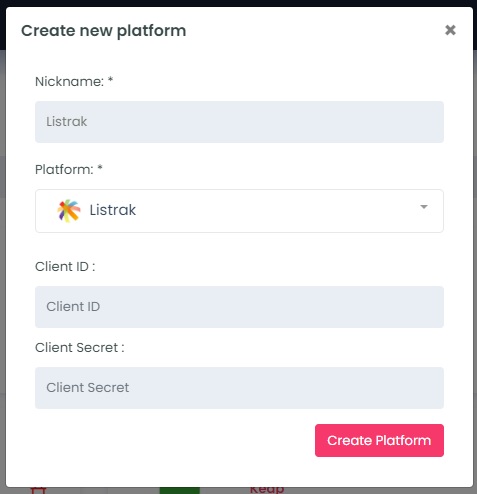
From the drop-down menu select Listrak.
To retrieve the Client ID and Client Secret, login to your Listrak account.
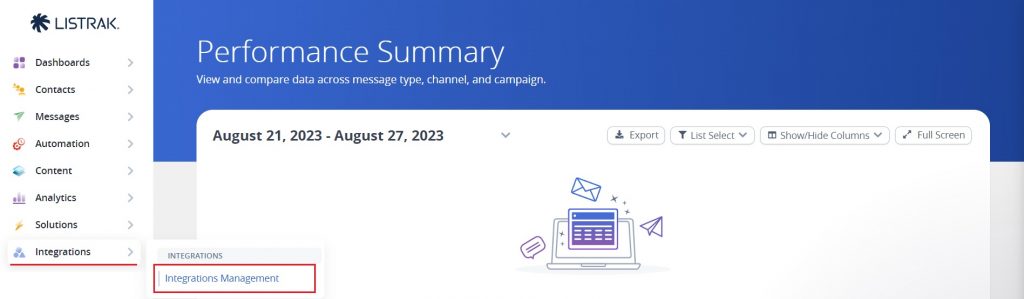
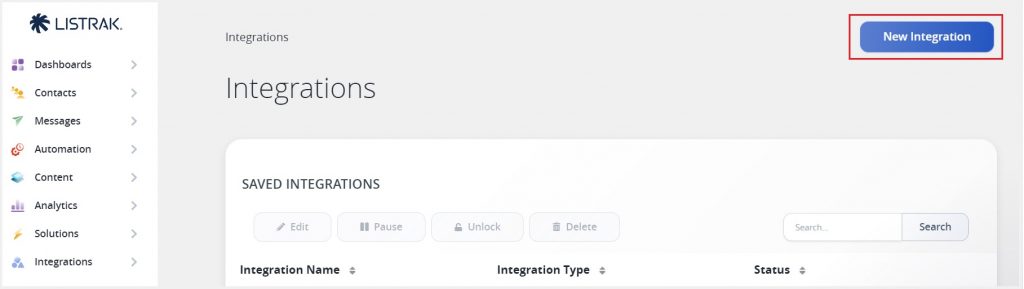
Click on Integrations → Integrations Management.
Click New Integration.
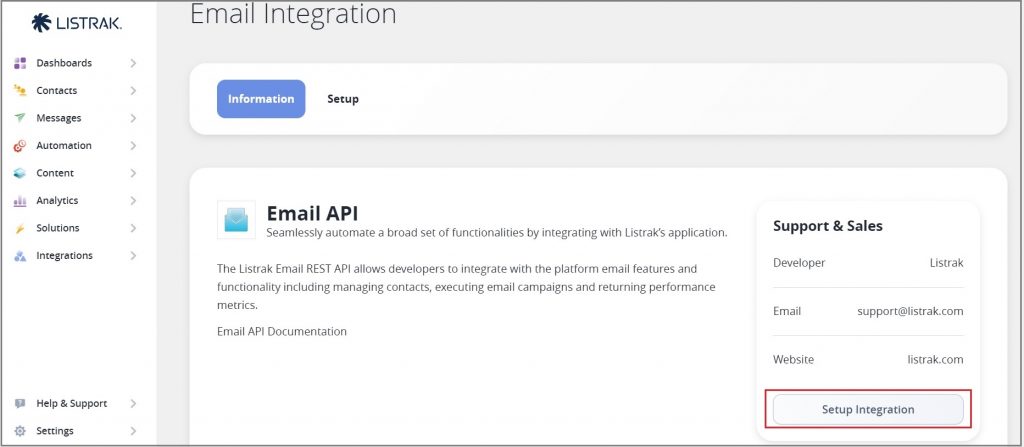
Click Setup Integration.
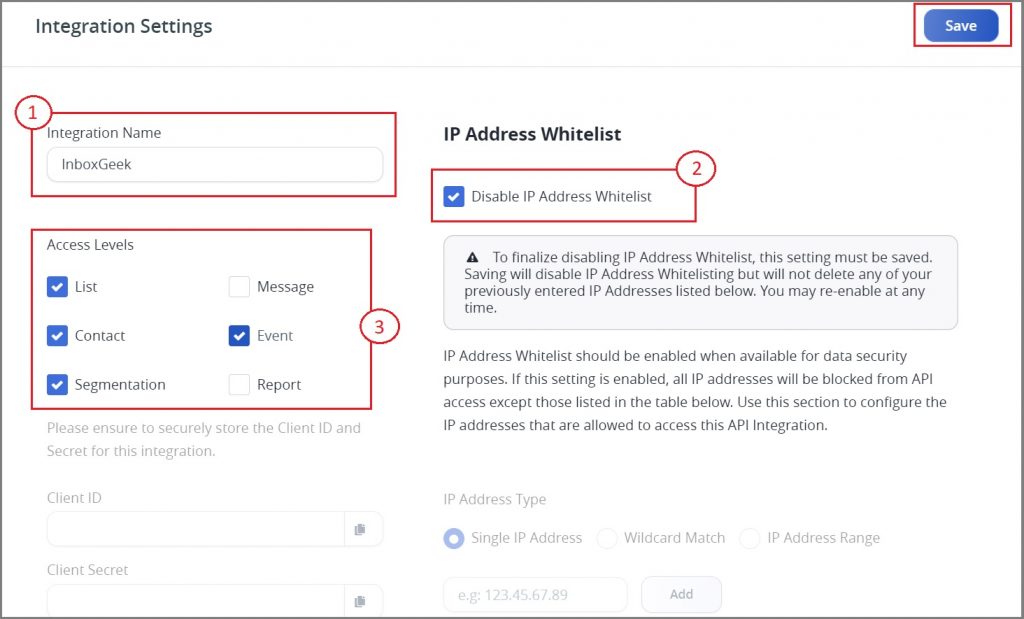
Next, create the settings for this integration:
- Name your new Integration.
- Click the box Disable IP Address Whitelist.
- Choose the Access Level by clicking List, Contact, Segmentation, and Event. All four of these options must be chosen in order for InboxGeek’s integration to work properly with Listrak.
Click Save.
Copy your Client ID and Client Secret.
**NOTE** this is the only time you can copy the Client Secret, it will disappear after this screen and a new integration will need to be created if a copy is not used right away.
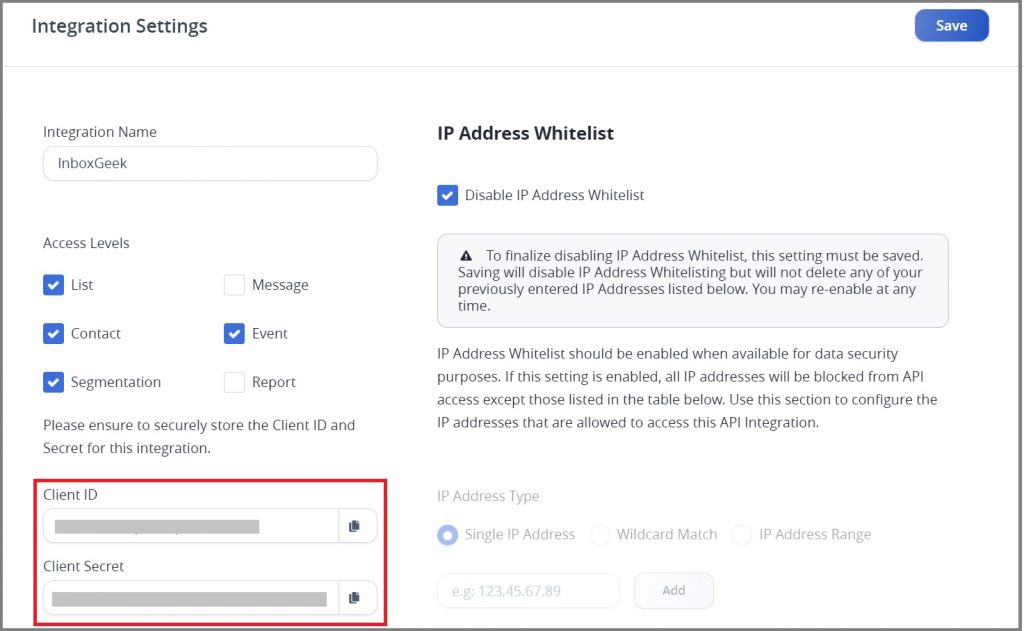
Return to InboxGeek and enter the copied Client ID in the Client ID field and the copied Client Secret into the Client Secret field.
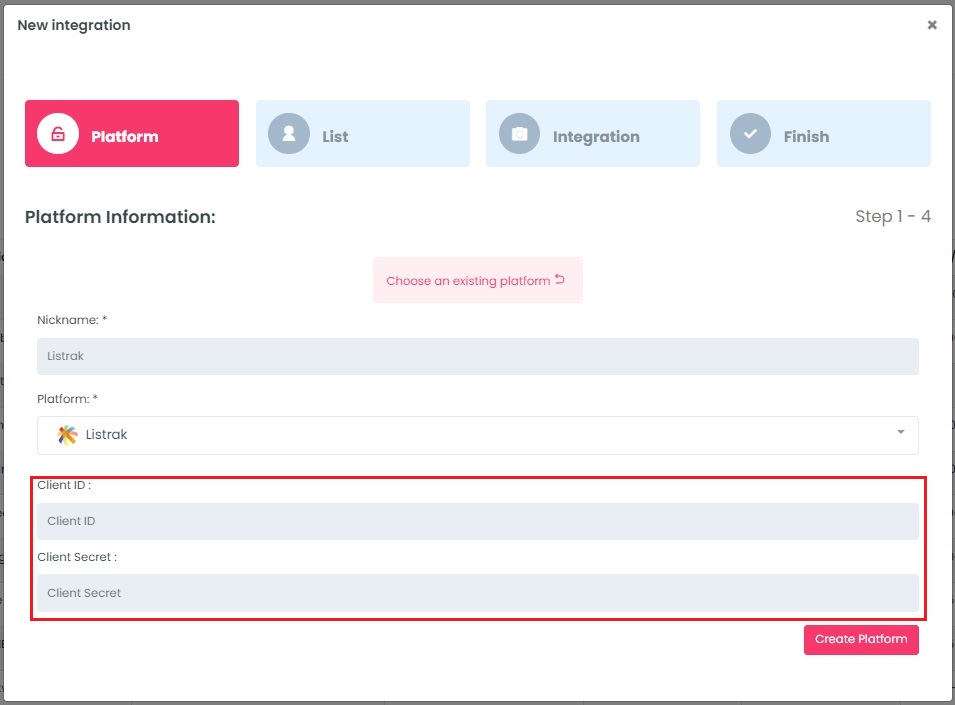
Click Create Platform. InboxGeek will fire a ping to the Client ID and Client Secret to confirm all is accurately entered.
If there are no issues then it will add Listrak to your list of integrated platforms.
From the Platform drop-down menu select Webhook.
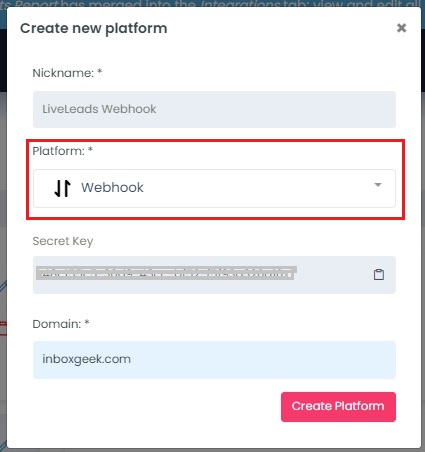
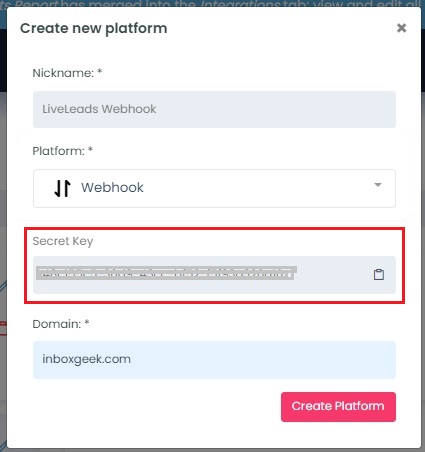
The field Secret Key is meant for InboxGeek’s internal use and does not need to be copied or modified.
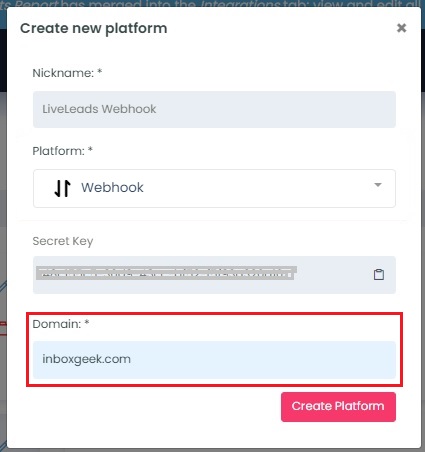
The field Domain will contain the domain name where your CRM lives.
Example:
If InboxGeek had a CRM, the Domain would be ‘inboxgeek.com’
Once all fields are completed, click Create Platform.