In this article…
Quick Links
Placing Your Script
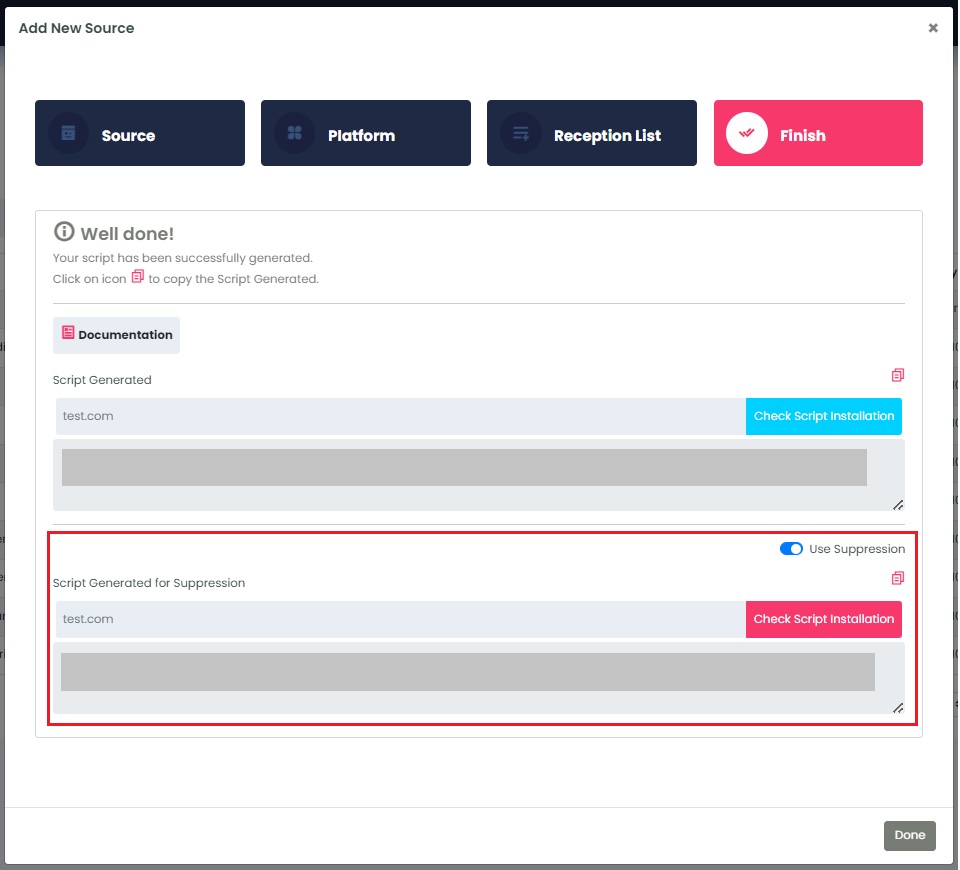
Once your script has been generated click the copy icon. If you are not ready to place the script immediately after this Source has been created, you can find a copy in LiveLeads > Sources.

InboxGeek generates two types of scripts; tracking and suppression.
The tracking script captures all of the site visitors and can be placed in the header globally or to a single page of the chosen site.
If there are leads that you do not want InboxGeek to capture, such as on your checkout page or thank you page, then use the supplied suppression script in those page headers.
Manual Installation
If you’re comfortable working directly with the files on your website, paste the LiveLeads Script directly into the <head> or <body> section of the pages where you wish to install the script.
Installation using your site’s built-in tools
Many website management tools have their own method for installing script elements such as the LiveLeads Script. We’ll list a few:
Google Tag Manager
- Login to your Google Tag Manager account and navigate to the container with your domain.
- Click on the red “New Tag” button.
- Name the tag “InboxGeek”.
- Under “Tag Configuration” choose custom HTML.
- Paste the LiveLeads Script into the area provided.
- Enable “Support document.write” in the lower left-hand corner of the window.
- Under “Triggering” choose “All Pages”. Click save.
- In the upper right-hand corner, click “Publish” and continue to publish all changes.
- “Container Version Description” is optional. You can add a description or click skip. Once you’ve completed these steps, your LiveLeads script should be active!
WordPress
Option 1: Use a plugin
- Install the plugin: Header and Footer.
- Go to the configuration panel of the plugin.
- Under the “Page head and footer” tab, add the LiveLeads Script to the section which says “Code to be added to the HEAD section of every page”.
Option 2: Add directly to the header.php file
- Go to “Appearance”, then “Editor”, then “header.php”.
- Search for </head>.
- Paste the LiveLeads Script before the closing </head> tag.
- Save the code by clicking “Update File”.
GoDaddy Website Builder
- Log in to your GoDaddy account and open GoCentral.
- Click Edit Site.
- Scroll in the main view of your site to where you want to add a section, and click the plus button.
- Scroll to bottom of the Add Section panel, click Show More and click the HTML pane.
- Click the HTML panel to begin customizing its settings, starting with the Section Title field.
- Paste the LiveLeads Script into the Custom Code field.
- You can leave the Forced Height field blank.
- When you’re finished, click the “<” or Done at the top of the HTML panel and your main window displays the results.
- Click Preview to see the results, and when you’re ready click Publish Site or Publish.
Once your LiveLeads script is installed save all changes.
Check Script Installation
The LiveLeads service has the ability to check that the script has been installed correctly on your site. To access this verification feature, go to LiveLeads > Sources > Actions > Copy Script > Check Script Installation.
The URL in this field does not have to match the site URL that the script was placed on. The notification window that is returned will either be a success indicating the script was placed in the header of your site and will now begin sending leads to your account or an error message will appear indicating that the script was not placed correctly.
If you are certain you have placed this script accurately, please reach out to your dedicated account manager for further assistance or email an InboxGeek Team Member at [email protected].

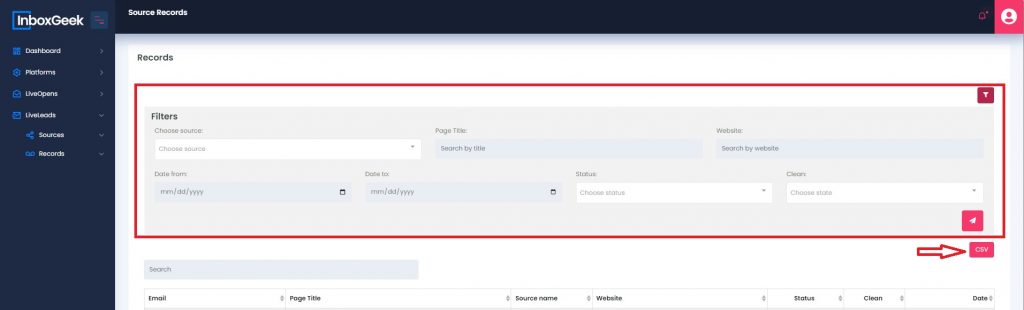
View Your Captured Leads
InboxGeek will return all leads to the portal under the Records tab. It will include the email address of the site visitor, the page title visited, Source Name (the integration it originated from), the URL identifier chosen in step 1 of your integration creation, whether or not the email is valid, and the date the lead was captured.

The list of records captured will be available for csv download by the filter settings, if desired.
To target the newly captured leads the next time they are online, create a LiveOpens integration to warm them up through your welcome series. Want to learn more? Click here!