In this article…
Quick Links
Source Automations
With Inboxgeek, you can easily set up source automations to customize your experience. These automations will send the leads you capture to your chosen platform based on the criteria you define. You can create as many source automations as you need.
Source automations help you categorize your leads based on the time they spend on your website, the actions they take (like adding items to their cart or proceeding to the checkout page), and the validation status of their email addresses. You can choose multiple options for the Validation statuses, but please note that you can only select one option for the categories Actions and Time spent on site.
If you wish, you can have multiple automations for a single source. The advantages of having multiple automations for one source include the ability to move these leads to specific lists within your platform. For example, if someone spends more than 30 seconds on your site, you can place them into an email sequence that delivers tailored content based on their interests.
When it comes to email validation, there are several different statuses, but remember that some emails may still be valid even if they don’t have a “verified” status. You have the flexibility to choose whether you want to look at the validation status or simply send all emails to your platform, regardless of their validation status.
Regardless of what you decide, each visitor captured utilizes one of your valuable Records credits. The strategy you employ to filter and market to these leads does not impact the structure of your LiveLeads subscription. Therefore, it’s imperative to understand that your filter preference of a particular lead does not exempt you from the responsibility of payment. Each lead, whether considered ‘worthy’ or not, contributes to the consumption of Records credits in accordance with the terms of your LiveLeads subscription.
How to Create a Source Automation
The InboxGeek system allows any captured records to be sent to an integrated platform so you can automate the next actions for your new leads.
An InboxGeek Platform is an integrated email service platform (or ESP) such as Klaviyo, Maropost, etc.
If a platform is unavailable or you wish to receive all records via CSV file only, go to your Records table and download the list of leads you’d like to import into your Platform.


Regardless of where you start from, both options follow the steps below:
1. Select your source from the drop-down menu. This automation is specific to the source chosen.
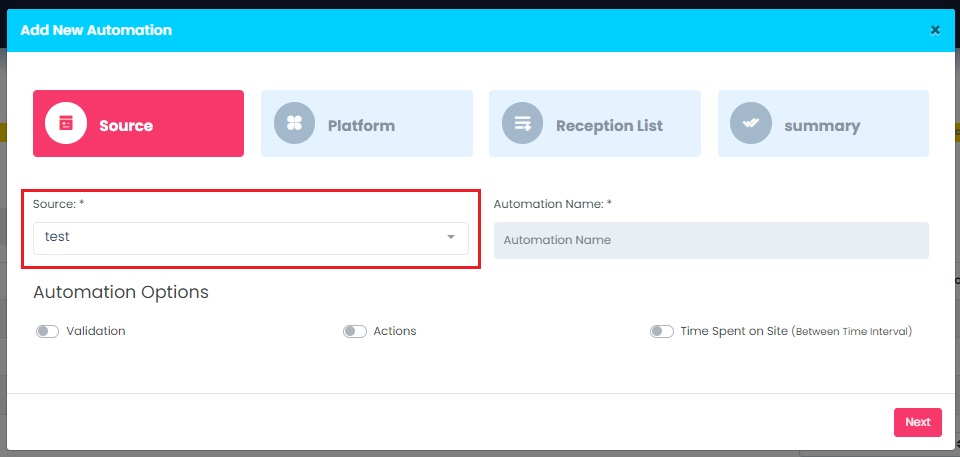
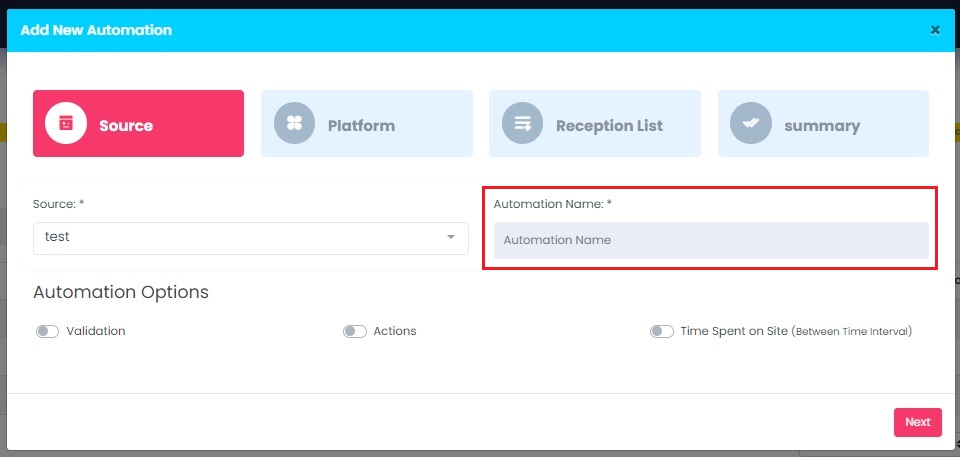
2. Choose a name for your automation. This name will serve as an identifier to help you recognize what this automation is for a particular source.
3. Choose your automation options:
- Validation: You have the ability to select one or more email statuses to be sent to your platform.
- Actions: Specify the actions that users take on your website, such as adding items to their cart or going to the checkout page. You can only select one action per automation.
- Time Spent on Site: Choose a time interval for the leads interaction with your site. For instance, if you only want to send leads to your platform if they’ve spent more than five minutes on your site, select the appropriate time range ‘5 minutes to xx minutes’.

4. After selecting your automation options click Next. InboxGeek will move you to the next step, Platform.
5. To receive captured records to an integrated platform, either choose from an existing integrated platform or create a new one.
*NOTE: To see how to add a new platform, visit the support documentation here.
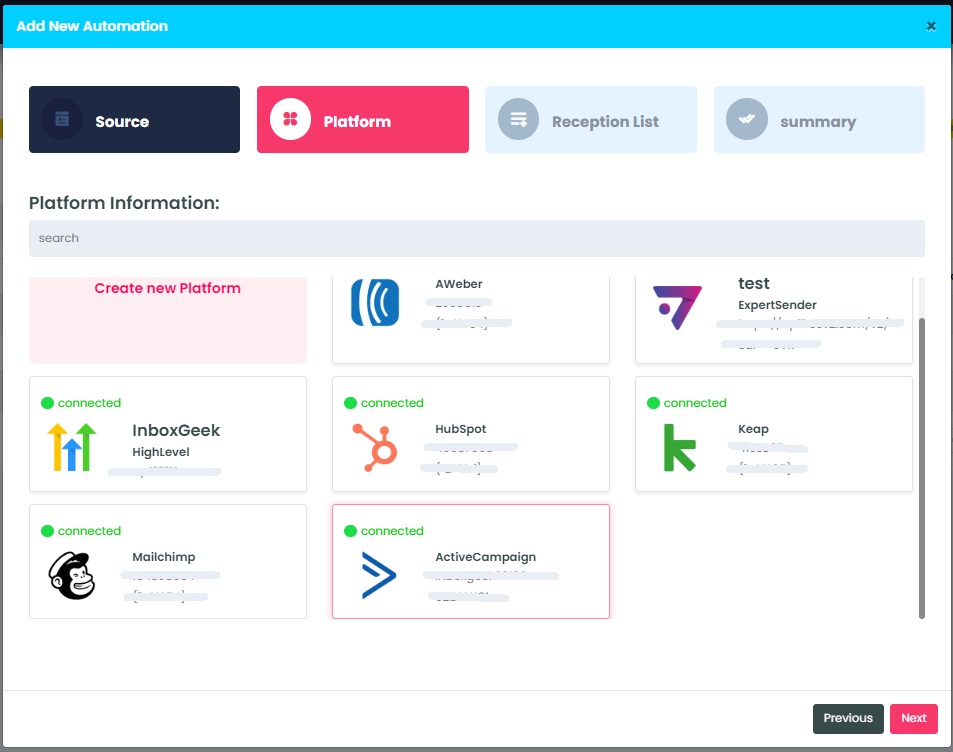
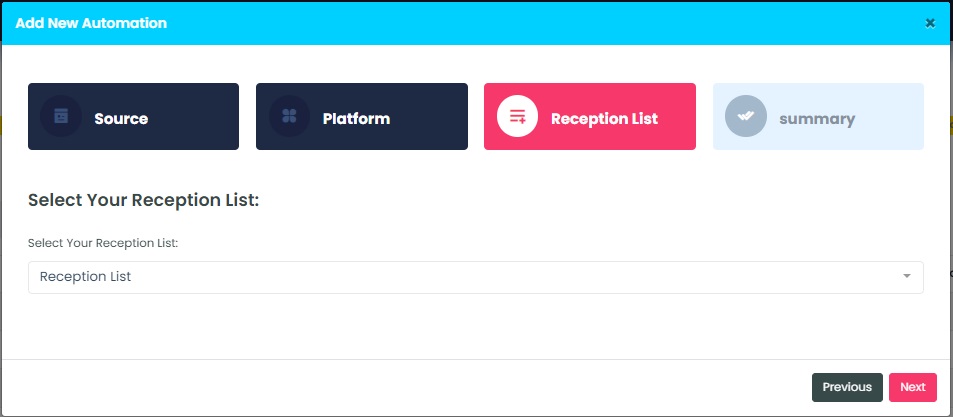
6. Once a platform is chosen or created, click next and InboxGeek will move you to the next step, Reception List.
Creating a Webhook integration with your LiveLeads? The next steps vary slightly, learn how here.
Before you continue –
The tab, Reception List, differs from all other platform integrations for LiveLeads and should be completed with the help of a dev team member or IT. InboxGeek team members will not have the information needed to complete the Webhook integration nor can they inform you exactly where to find it as it is specific to the custom CRM you are using.
InboxGeek is always ready to assist you in any way, including video calls to walk you through your integration setup.
The Website Link field will be a URL used on the backend of your CRM. A dev team member or IT member will know where to find this.
Example: https://webhook.site/f65ce7b0-6bc9-4a34-8f2d-71dcdb5ed335
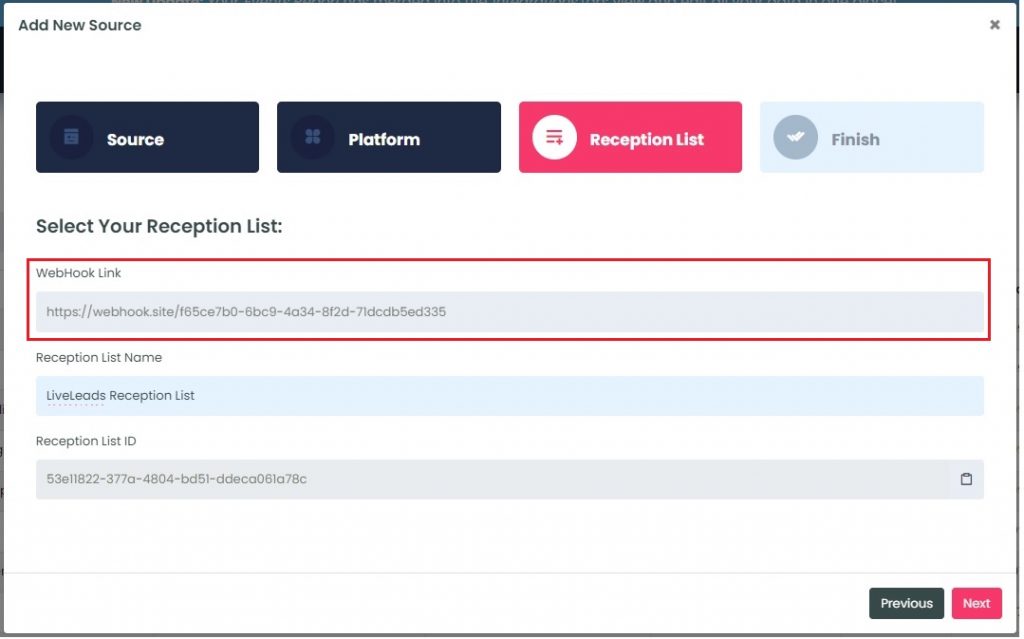
The Reception List field is the name of the list you have in your CRM that you’d like all captured leads to be sent to.
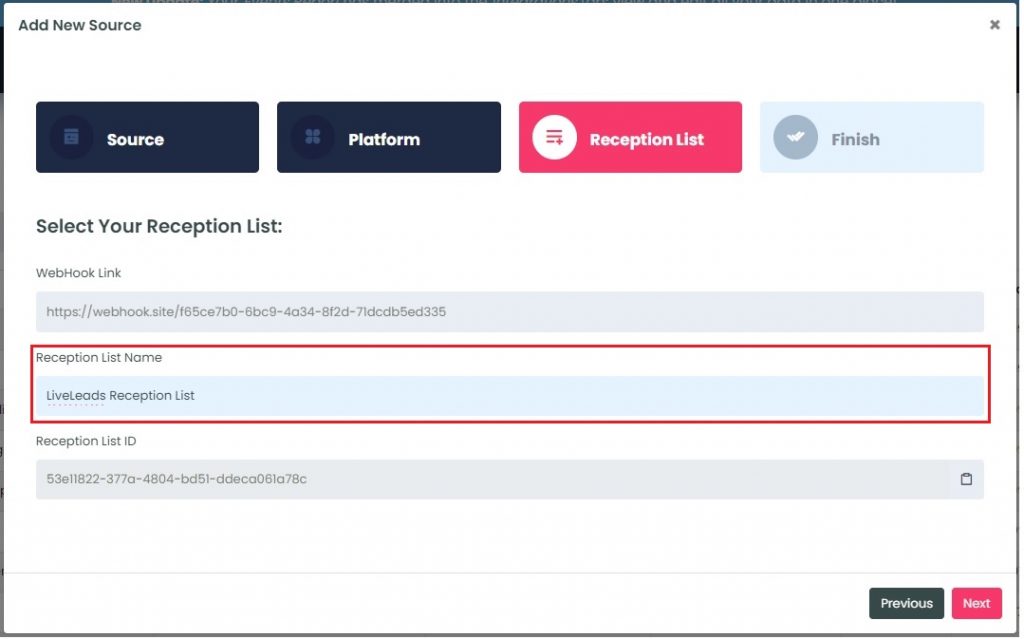
The Reception List ID is a custom generated code for your Webhook integration and is an optional string of code your dev team / IT can use with your CRM.
**This is the only time the Reception List ID is available to copy.

Once all fields have been completed, click Next to finish the LiveLeads source creation.
NOTE: InboxGeek will begin acquiring records immediately after your script is placed. If you want to create a LiveOpens integration to automatically feed your new leads into your warm up sequence within your platform, create this now. For instructions on how to complete this setup click here.
InboxGeek will load all existing lists from your platform into the Reception List drop-down menu.
The list that you use in this step will receive all captured records from this LiveLeads source.
8. Click Next to finish the LiveLeads Source Automation.
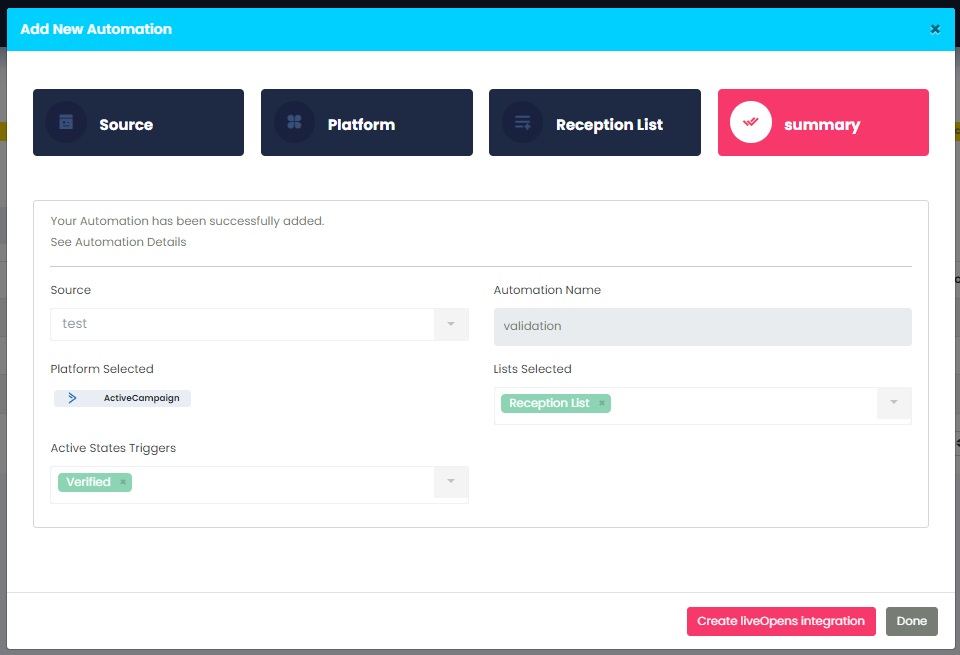
NOTE: InboxGeek will begin sending records immediately after your script is placed and your source automation is created. If you want to create a LiveOpens integration to automatically feed your new leads into your warm up sequence within your platform, create this now. For instructions on how to complete this setup click here.